Simplify IT Asset Management and unify your inventory
Hardware Asset Management: Definition, Lifecycle, And How to Implement it
Hardware Asset Management plays a critical role in helping organizations keep control of their physical IT environment. When managed correctly, it provides visibility across the entire asset lifecycle and helps IT teams make smarter operational and financial decisions.
In the following paragraphs, we’ll walk through what Hardware Asset Management is, why it often fails in real-world environments, and how the lifecycle typically works. You’ll also find a practical HAM checklist, a step-by-step guide to implementing HAM with InvGate Asset Management, and key capabilities to look for in HAM software.
What is Hardware Asset Management?
Hardware Asset Management (HAM) is the process of identifying, tracking, monitoring and maintaining physical IT assets throughout their period of use, also known as IT asset lifecycle. This includes any tangible technological asset with operational or financial value to an organization.
Although companies usually tailor it to fit their own particular needs, the Hardware Asset Management lifecycle is usually broken down into five stages: Planning, Procurement, Deployment, Service or Maintenance, and Retirement.
Hardware Asset Management (also called IT Hardware Asset Management) is a subset of IT Asset Management (ITAM), which also includes Software Asset Management (SAM). Whereas HAM deals with physical and tangible assets (like computers, laptops, servers or peripherals), SAM deals with digital or intangible assets (like applications, programs or databases).
Why Hardware Asset Management fails in real life
Completely neglecting Hardware Asset Management or running it poorly leads to the same harmful outcomes for an organization: asset over-purchasing, weak detection and control of ghost assets, limited visibility into warranty periods, chaotic asset replacement processes, and unsatisfactory, or even failed, audits.
All of these Hardware Asset Management failures bring serious, and sometimes unnoticed, consequences. The real impact of poor Hardware Asset Management shows up as reduced team productivity, disruptions in production or service delivery, and increased financial costs.
Hardware Asset Management lifecycle stages
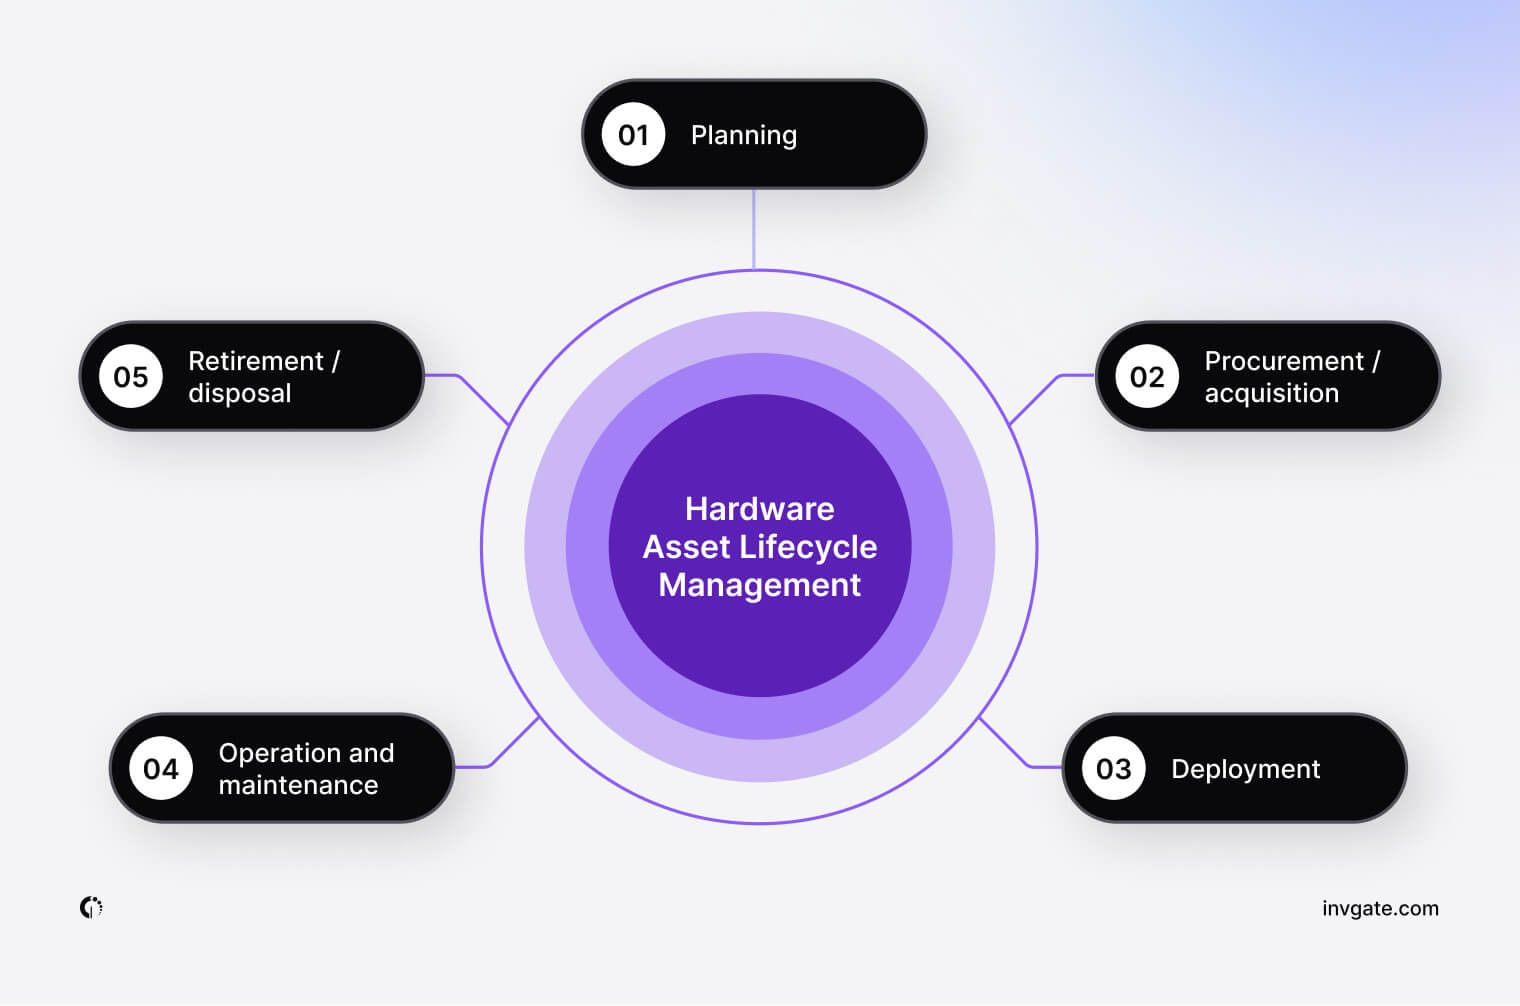
The Hardware Asset Management lifecycle is the structured process that assets go through from the moment the need to acquire them is identified until their retirement and final disposal. Each organization develops its own lifecycle, as it usually responds to specific business needs. However, most Hardware Asset Management lifecycles consist of five stages:
- Planning.
- Procurement or acquisition.
- Deployment.
- Operation and maintenance.
- Retirement and disposal.
For each stage of the lifecycle, there are multiple hardware asset tracking procedures. While some companies still rely on manual processes, others adopt automated and streamlined workflows powered by Hardware Asset Management software.
Step 1: Planning
Planning is the foundational stage of the Hardware Asset Management lifecycle, where organizations define their hardware needs, standards, and budget. It typically includes forecasting demand, setting procurement policies, selecting approved device models, and aligning asset decisions with business and IT goals.
Step 2: Procurement/acquisition
Hardware procurement is the stage where hardware is purchased, leased, or otherwise obtained based on the planning decisions. It usually involves selecting vendors, negotiating contracts, placing orders, and registering assets with key details such as cost, warranty, and ownership.
At this point, assets should already be documented in the platform (if there is one in place) to ensure full traceability from day one and avoid gaps in inventory.
Step 3: Deployment
Deployment is the stage where hardware is delivered, configured, and assigned to users or locations. This typically includes asset tagging for hardware, recording ownership, installing required software, and validating that assets are ready for use.
A well-managed deployment process ensures accurate inventory data from the start and helps IT teams maintain visibility as assets enter active service.
Step 4: Operation and maintenance
Operation & maintenance is the longest phase of the Hardware Asset Management lifecycle, covering the day-to-day use and upkeep of assets. It includes monitoring asset health, managing repairs, tracking warranty status, updating locations or ownership, and supporting users.
Some frameworks add a separate Optimization / Refresh stage at this point, focused on evaluating asset performance and defining replacement strategies. In practice, this is usually where hardware refresh planning begins, using operational data to identify aging or high-cost assets, before those decisions are formalized in the next Planning cycle.
Step 5: Retirement / disposal
Retirement / disposal marks the end of the hardware lifecycle, when assets are formally removed from service. This stage typically includes secure data wiping, certified recycling or disposal, potential resale or donation, and final financial reconciliation.
Handling retirement properly is essential for security, compliance, and accurate reporting, while also ensuring assets are fully closed out in the system.
Hardware Asset Management checklist
A Hardware Asset Management checklist is a structured list of specific tasks aligned with each stage of the physical IT asset lifecycle. Its goal is to simplify processes that would otherwise feel abstract or difficult to put into practice.
HAM checklists are organization-specific, since each process is designed around the capabilities and needs of each team. However, the following tasks commonly appear in most standard HAM checklists:
Stage 1 - Planning
- Define hardware standards and lifecycle policies - Establish approved device models, acquisition guidelines, and expected lifespans for each asset category to ensure consistency and predictable refresh cycles.
- Define mandatory asset fields - Set the minimum required data for every asset, such as category, model, cost center, purchase cost, and expected lifecycle, to guarantee clean and usable inventory records from day one.
- Define HAM roles and ownership - Clearly assign responsibilities across the lifecycle, including planning, procurement, deployment, maintenance, and retirement, so every stage has an accountable owner.
Stage 2 - Procurement / Acquisition
- Execute hardware purchases and acquisitions - Acquire devices according to Planning decisions, including vendor selection, contract negotiation, and purchase order execution.
- Register assets with financial and warranty data - Create asset records with key procurement information such as vendor, purchase date, cost, warranty period, and contract reference.
- Link assets to contracts and invoices - Associate each asset with its corresponding purchase documents to ensure full traceability and simplify audits.
Stage 3 - Deployment
- Tag and confirm physical assets - Apply QR or RFID tags and verify physical receipt to establish a clear connection between digital records and real devices.
- Assign assets to users or locations - Link each asset to a user, department, or location and mark it as in service.
- Validate configuration and operational readiness - Confirm initial setup and complete operational fields such as deployment date, status, and responsible owner.
Stage 4 - Operation & Maintenance
- Maintain asset records and service history - Keep asset data current by tracking ownership changes, repairs, warranty status, and operational condition.
- Identify refresh candidates and ghost assets - Detect aging, inactive, or high-cost devices to feed hardware refresh planning and eliminate unused or missing assets.
- Define and execute audit cadence - Establish regular reviews, such as monthly exception checks and quarterly inventory audits, to maintain accuracy and lifecycle control.
Stage 5 - Retirement / Disposal
- Perform secure data wiping - Ensure all data is safely erased and document certificates when required before removing assets from service.
- Dispose or repurpose hardware responsibly - Recycle, resell, or donate equipment according to organizational and regulatory policies.
- Close asset records and financial tracking - Formally retire assets in the system and finalize accounting records to complete the lifecycle.
How to do Hardware Asset Management with InvGate Asset Management
InvGate Asset Management is a no-code IT Asset Management platform designed to manage IT assets, with a strong focus on Hardware Asset Management. It enables organizations to identify, track, monitor, and manage physical assets across every stage of their lifecycle.
While the platform is flexible and allows you to implement your own Hardware Asset Management process, these are the steps we recommend following to achieve fast results:
- Build your centralized hardware inventory.
- Classify assets and define lifecycle states.
- Monitor asset health and drive refresh decisions.
- Automate actions and workflows across the lifecycle.
- Create dashboards and reports.
Before we begin, feel free to start our 30-day free trial and explore the platform for yourself, no credit card required, or you can always explore our platform with our product tour.
1. Build your centralized hardware inventory
This first step focuses on creating a complete and reliable source of truth for all your physical IT assets. The goal is to populate your IT asset inventory from multiple sources while ensuring data quality from the start, so every downstream process is built on accurate information.
- Multiple inventory population methods - Populate assets through manual entries (single or bulk), Agent-based discovery, automated network discovery, and integrations with external platforms. This ensures full coverage across all device types, including environments where agents cannot be installed.
- Data normalization - Automatically detect duplicate assets created by multiple population methods and merge them into a single record, keeping your inventory clean, consistent, and ready for operational use.
- Automated asset tracking - Use the Agent to continuously collect hardware and software data from supported devices, ensuring asset records stay up to date with minimal manual effort.
2. Classify assets and define lifecycle states
Once your inventory is in place, the next step is to organize assets and give them operational context. This is where you move from simply knowing what you have to understanding how assets are used, where they are located, and what stage of the lifecycle they are in.
- QR code generator for physical tagging - Generate QR codes to physically tag your hardware, making it easier to identify and manage assets that cannot run the Agent. This is especially useful for on-site audits and field work, helping teams quickly access asset records by scanning the code.
- Smart Tags - Create dynamic asset groups based on conditions such as location, model, status, or age. Assets are automatically added to these groups when they meet the criteria, simplifying administration and enabling scalable Hardware Lifecycle Management.
- Custom fields - Define custom fields to capture organization-specific data such as cost center, business unit, deployment type, or internal ownership. This allows you to adapt asset records to your operational reality while maintaining consistent classification across the lifecycle.
3. Monitor asset health and drive refresh decisions
This stage corresponds to day-to-day operations and maintenance, and it is where hardware refresh planning begins. Here, you move from static inventory to active lifecycle management by continuously evaluating asset condition, financial value, and coverage status.
- Health rules - Define health conditions for your hardware and receive automatic alerts when assets fall outside expected parameters, helping you proactively detect risks and operational issues.
- Automated depreciation - Automatically calculate asset depreciation over time based on predefined rules, giving both IT and Finance clear visibility into current asset value and supporting data-driven replacement decisions.
- Automated warranties - Track warranty periods automatically and surface expiring coverage, enabling timely repair actions and smarter refresh planning.
- License and Contract Management - Associate hardware assets with contracts and licenses to centralize vendor information, track obligations, and maintain compliance while aligning financial data with asset health.
4. Automate actions and workflows across the lifecycle
At this stage, automation becomes the connective layer across everything you have already configured. Instead of managing assets manually at each step, you orchestrate processes that react automatically to changes in asset status, health, and lifecycle stage.
Here, automation helps you:
- Trigger notifications when health rules fail or warranties approach expiration.
- Automatically update lifecycle states as assets move from stock to in use, under repair, or retired.
- Generate alerts when depreciation thresholds are reached or anomalies appear.
- Reduce manual work by standardizing recurring operational tasks.
This step turns your Hardware Asset Management process into a continuous, self-updating workflow.
5. Create dashboards and reports
The final step focuses on turning asset data into visibility and actionable insights. This is where all the information collected and automated throughout the lifecycle comes together to support daily operations, audits, and strategic decisions.
- Dashboards - Build visual dashboards with targeted charts to monitor hardware status, lifecycle distribution, health conditions, warranty coverage, and refresh candidates in real time, all from a single workspace.
- Reports - Generate structured reports for inventory audits, lifecycle reviews, financial planning, and compliance, giving stakeholders clear, exportable documentation to support decision-making.
This step ensures your Hardware Asset Management process remains transparent, measurable, and continuously optimized.
Key capabilities to look for in HAM software
Choosing the right Hardware Asset Management software comes down to finding a platform that helps you move beyond basic inventory and manage hardware across its entire lifecycle. These are the core capabilities to prioritize when evaluating HAM tools:
- Centralized hardware inventory - A single source of truth that consolidates all physical assets, regardless of how they are discovered or added, so teams always work with consistent data.
- Flexible discovery and asset tracking - Support for multiple population methods (manual entry, agents, network discovery, integrations) combined with continuous tracking to keep asset information current with minimal effort.
- Data normalization and Duplicate Management - Built-in mechanisms to detect and merge duplicate records created by different discovery sources, ensuring a clean and reliable inventory.
- Lifecycle and Classification Management - The ability to define lifecycle states and organize assets by type, location, owner, or condition, making it easier to manage hardware at scale.
- Asset health monitoring - Tools to evaluate hardware condition, warranties, and aging devices, helping IT teams proactively identify risks and plan refresh cycles.
- Financial visibility (depreciation and warranties) - Native support for depreciation and warranty tracking to connect technical asset data with financial impact and replacement timing.
- Automation and alerts - Workflow automation, notifications, and rule-based triggers that reduce manual work and keep processes moving as assets change status.
- Dashboards and reporting - Customizable dashboards for real-time visibility, plus structured reports for audits, compliance, and strategic planning.
- Contract and license association - The ability to link hardware to contracts and licenses, centralizing vendor information and supporting compliance and cost control.
- Integrations with your IT ecosystem - Connectivity with Service Management, identity platforms, and other tools to ensure hardware data flows naturally into daily IT operations.
Common pitfalls and how to avoid them
Getting Hardware Asset Management right means starting on solid ground and staying alert to common mistakes that can derail even well-designed strategies. Below are five frequent HAM pitfalls, along with practical ways to avoid them:
- Relying on incomplete or manual inventories - Tracking hardware in spreadsheets or disconnected systems quickly leads to blind spots. Avoid this by centralizing inventory and using automated discovery and tracking to maintain continuous visibility.
- Allowing duplicate asset records to accumulate - Multiple discovery methods often create duplicates, which distort reporting and decision-making. Use data normalization and asset standards to merge duplicates and maintain a single source of truth.
- Working with incomplete asset data and missing ownership - When key fields like location, lifecycle status, or responsible owner are missing, accountability breaks down and assets are easily lost. Define mandatory asset fields early and enforce ownership during deployment.
- Not defining lifecycle states from the start - Without clear lifecycle stages, assets are managed reactively and inconsistently. Establish lifecycle states upfront and review them regularly to ensure assets are actively managed from deployment to retirement.
- Running refresh cycles reactively instead of using operational data - Waiting for devices to fail increases downtime and costs. Monitor asset health, warranties, and depreciation to identify refresh candidates proactively and plan replacements ahead of time.
Frequently Asked Questions (FAQs)
What’s the difference between ITAM and HAM?
IT Asset Management (ITAM) is the broader discipline that covers all IT assets, including hardware, software, and any other IT asset. Hardware Asset Management (HAM) is a specialized subset of ITAM focused exclusively on physical devices, such as laptops, servers, network equipment, and peripherals, managing them throughout their full lifecycle.
What hardware should be tracked first?
Start with business-critical and high-value assets, such as end-user devices, servers, and network equipment. These typically represent the highest operational risk and cost. From there, expand coverage to secondary hardware, prioritizing anything tied to compliance, security, or service delivery.
How often should you audit hardware assets?
Rather than relying only on annual audits, aim for continuous visibility. A common approach is to run monthly exception reviews (for missing, inactive, or inconsistent assets) and quarterly inventory validations. This keeps data accurate year-round and reduces surprises during formal audits.
What data is required for warranty and refresh planning?
At a minimum, you should track purchase date, warranty start and end dates, asset age, lifecycle status, maintenance history, and depreciation. Combining technical health with financial data allows teams to plan refresh cycles proactively instead of reacting to failures.
How do you avoid duplicate hardware records?
Duplicates usually appear when assets are discovered through multiple sources. The best way to prevent this is by using data normalization to detect overlapping records and merge them into a single asset, while also enforcing mandatory fields like serial number and asset tag to maintain a clean source of truth.
Read other articles like this one:
