How to build a training request process in your service desk
A standardized process for training requests helps organizations manage course approvals, budgeting, and planning without unnecessary back-and-forth.
With InvGate Service Management, you can automate the entire process – keeping requests consistent, approvals faster, and stakeholders informed.
#1. Set up the training request workflow

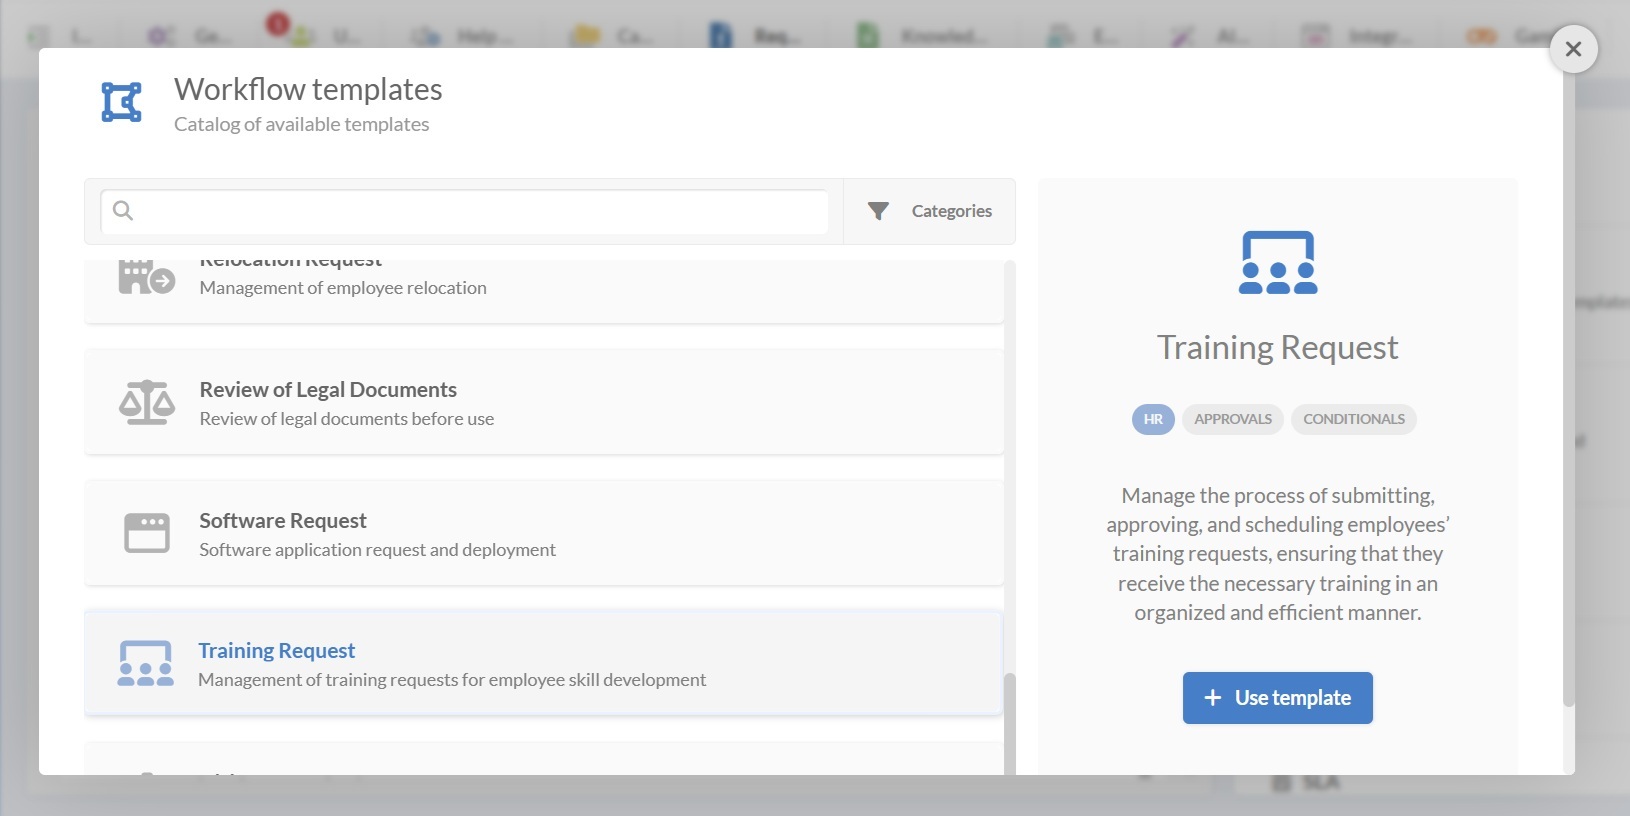
You can quickly launch a training request process by selecting the Training Request workflow template and adapting it to your needs (you can download the workflow template preview from here.)
- Log in with an admin role and go to Settings > Requests > Workflows.
- Select the Training Request workflow from the list of templates.
- Click Use template to open it in the Diagram Editor.
Tip: From Settings > Requests > Workflows, you can also build a new workflow from scratch, (by clicking on “Add”), import workflows with the .sdw extension, or view and edit existing ones.
If the template covers all your requirements, you can publish it right away. Otherwise, keep reading to customize it.
#2. Edit the training request workflow template

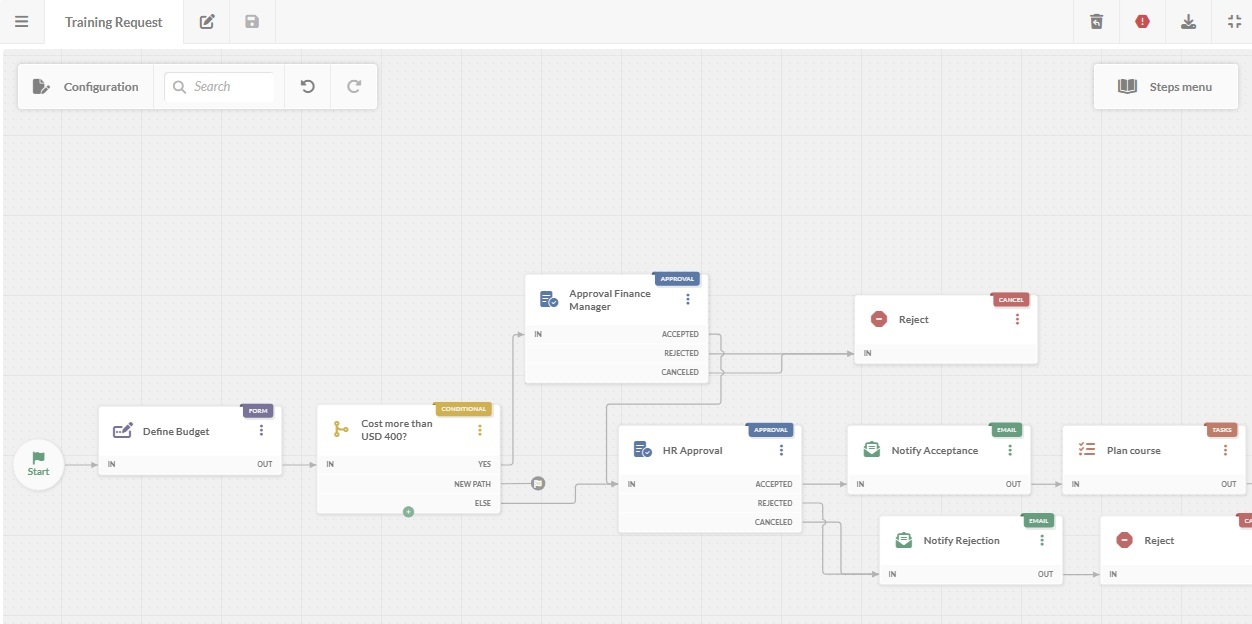
In the workflow diagram, you access the options that help define how the workflow behaves, who manages it, and what users see.
You can double-click on any block to open its configuration and modify forms, tasks, approvals, and more.
Here’s what each stage does:
1. Start form
The workflow begins with a form for the requester to provide essential course details:
- Course name (from a predefined list or as free text).
- Delivery modality (online, in-house, or external).
- Comments (any relevant notes).
Tip: You can also add optional fields like course provider, proposed start date, etc.
2. Define budget form
Once submitted, the request moves to the budget form:
- Estimated cost (numeric value).
- Comments.
- Attachments (such as quotations or course outlines).
3. Cost more than X USD? (conditional)
This block checks whether the estimated cost exceeds a defined threshold:
- Yes – Sends to Finance Manager approval.
- No – Goes directly to HR approval.
4. HR approval
HR reviews the request and chooses one of three actions:
- Accepted – Moves to “Acceptance notification.”
- Rejected – Moves to “Rejection notification.”
- Canceled – Moves to “Rejection notification.”
Tip: You can restrict visibility so only the HR group can access this step.
5. Notify acceptance email
If approved, the requester gets an email confirmation with next steps (e.g., registration timelines, payment instructions).
6. Plan course
A task list ensures all preparation steps are tracked, such as:
- Registering for the course.
- Scheduling training dates.
- Booking meeting rooms or facilities.
Each task includes description, due date, and responsible person. You can enable the task creation toggle to add more tasks during execution.
7. Notify rejection email
If rejected, the requester receives an email stating the decision, with an optional field for the approver to explain the reason.
8. Approval – Finance Manager
For requests over the cost cap, the Finance Manager reviews and decides:
- Accepted – Moves to “HR approval.”
- Rejected – Ends workflow.
- Canceled – Ends workflow.
Tip: Make the approval/rejection message mandatory to keep a record of the decision.
#3. Deploy the workflow
Once your training request workflow is ready:
- Click on the save icon and return to the Workflows menu.
- Click on Publish version to activate the updated process.
- Assign the workflow to a request category on the service catalog, such as Human Resources > Training requests.
- Click Assign now.
From that point on, any request in that category will follow the defined workflow.