How to create a tier 0 for support that actually works
With InvGate Service Management, you can put together a level 0 support layer that actually works — one that employees will use, and that reduces the number of tickets reaching your IT team.
The main building blocks that make it possible are the service catalog, the self-service portal, the knowledge base, the Virtual Service Agent, and AI-powered features. Each of these elements can be configured in just a few steps, and once they’re in place, many requests are resolved without IT intervention.
#1. Set up a service catalog
A well-structured service catalog is the foundation of tier 0 support. Instead of browsing through long lists or sending emails, employees see clear options like password reset, equipment request, or access permissions.
By choosing the right category, users are guided toward self-service resources and pre-configured guidance that helps them resolve requests without creating a ticket.
Because each category represents a defined request type, you can link it to helpful tools: knowledge base articles, instructions and manuals, or automated workflows that provide instant answers or perform simple actions.
1. Catalog configuration
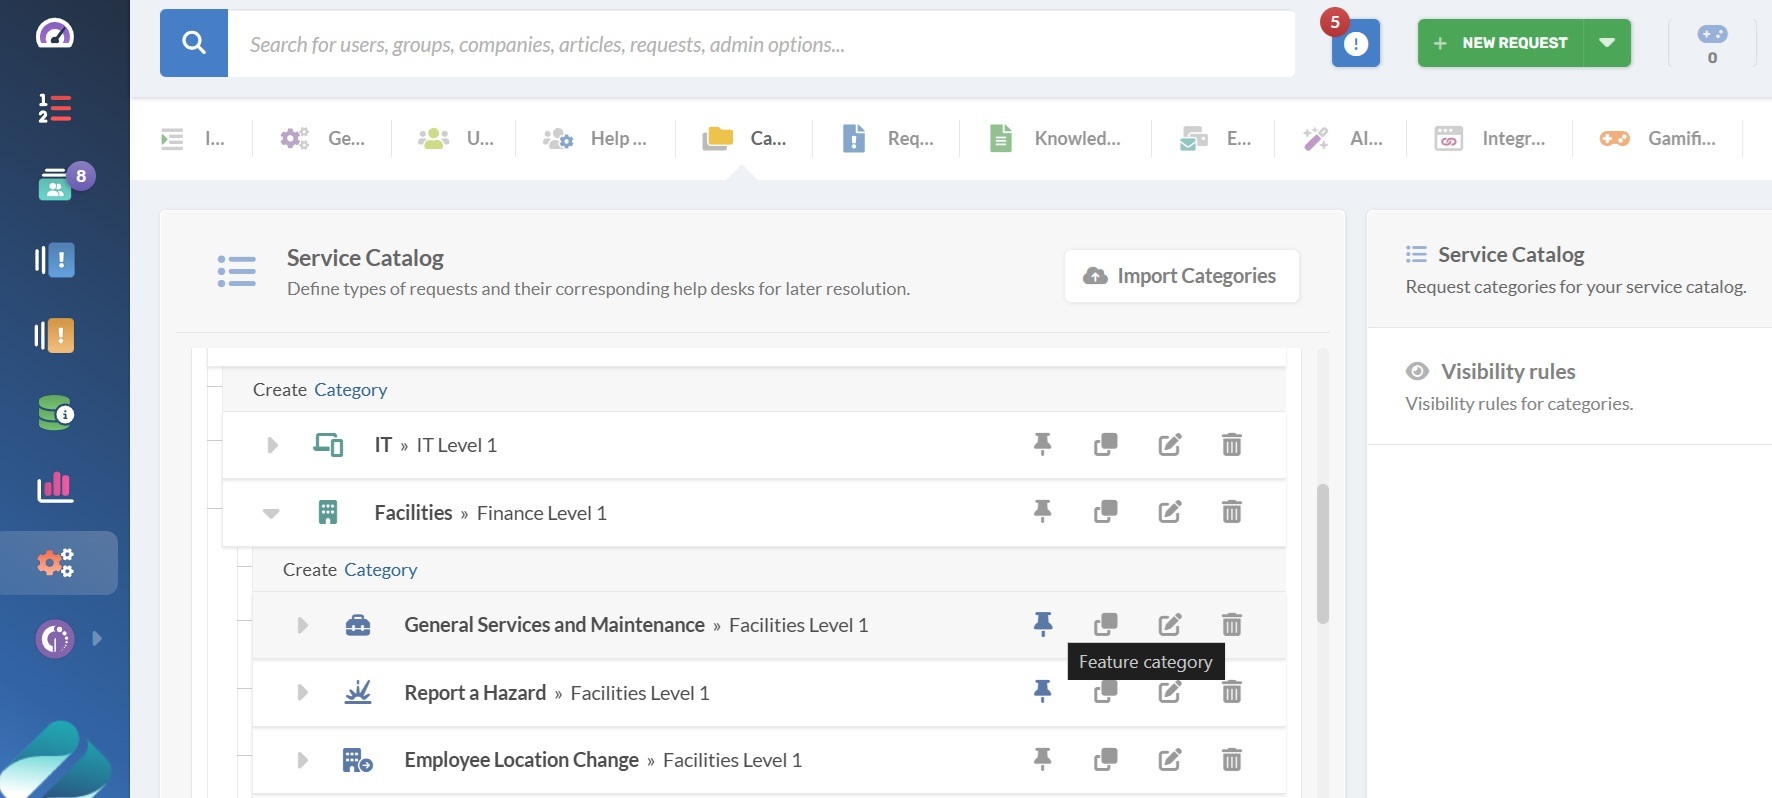
To start, go to Settings > Catalog in InvGate Service Management. This is where you’ll decide how the catalog will be structured.
Click on Create category and define:
- Parent categories: broad groups like IT, HR, or Facilities.
- Report a failure > Devices, you could have "Computer failure" and "Smartphone failure."
You can edit categories anytime using the pencil icon. Under the Knowledge Base tab, link types of requests to helpful articles, adding them to Featured Articles. Plus, you can make one of those a Default article, to make it appear as a suggestion before someone submits a ticket — helping them resolve the issue independently.
Tip: Begin with the requests your team handles most often (like password resets, equipment loans, or onboarding).#2. Set up a self-service portal
The self-service portal gives employees one place to submit requests, check their progress, and, most importantly, find answers.
On InvGate Service Management, the portal is ready to go out of the box — you just need to customize it for your organization. That includes basic branding (like your logo and colors) and deciding which services to highlight on the homepage.
1. Portal configuration

Keeping the portal aligned with your brand makes it feel familiar and helps adoption.
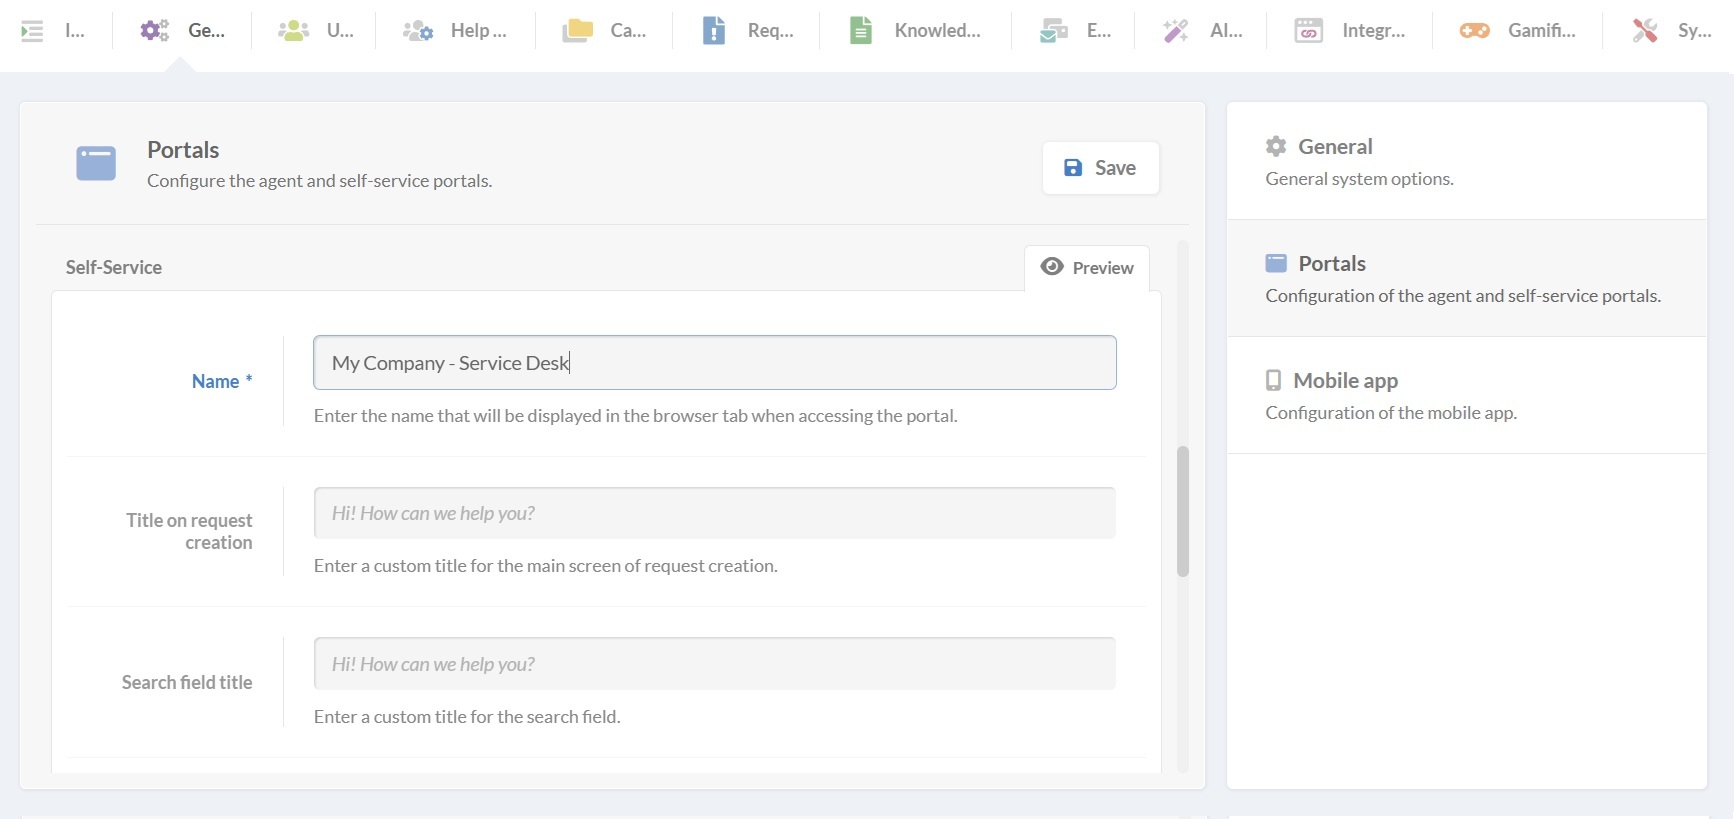
- Go to Settings > General > Portals.
- Under “Self-service portal,” enter a name and upload your logo.
- Add a welcome message and search prompt to guide employees when they log in.
- Choose a portal style. You can pick from preset colors and images or upload your own header background to match your organization’s branding. You’ll see the recommended sizes listed in the platform.
2. Pinning services to the portal

This connects directly to the service catalog you set up in the previous step. You’ll choose the pinned services that will appear on the portal homepage, so employees can quickly request the things they need most (like “Password reset” or “New laptop”). You can update these at any time.
- Go to Settings > Catalog.
- From the services list, pick the ones you want to feature and select the Pin icon to add them to the portal.
- Save your changes.
Then, test the experience: log in as a user, search for common requests, and adjust categories or descriptions if anything isn't clear.
#3. Build a knowledge base
A searchable knowledge base allows employees to solve common problems independently. Articles like “How to connect to the VPN” or “How to install a printer driver” help prevent tickets from being created. A knowledge base also provides consistent, up-to-date guidance, improving the overall employee experience.
InvGate Service Management makes it easy to create and manage a knowledge base, with features to organize content, control permissions, and even leverage AI for article creation.
1. Knowledge base setup
- Log in as an administrator and go to Settings > Knowledge Base.
- Decide who can access the knowledge base:
- Disabled
- Private
- Any registered user
- Configure comments to allow all registered users to post or limit them to editors only.
- Set permissions for different groups. For example, HR agents might only manage HR-related categories, while IT agents manage IT-related content.
- Define categories: these are the structure and taxonomy of your knowledge base. Think carefully about usability — organize articles by what users are trying to accomplish rather than strictly by department. For example:
- IT Support → Mobile phones, Applications, Infrastructure.
- HR → Onboarding, Benefits.
2. Creating knowledge base articles
InvGate Service Management makes creating articles simple, and there are two main ways to do it.
A. Create an article from scratch
- Log in as an agent and go to Articles. Click on New article.
- Select a category for the article. For example, “Human Resources” → “Time off and leave.”
- Choose the privacy setting:
- Public: all employees can see it.
- Private: only agents and managers can see it
- Add a title and write the article content. You can format text, add images, or copy and paste content directly.
- Click “Save” and publish.
B. Create an article from a closed ticket

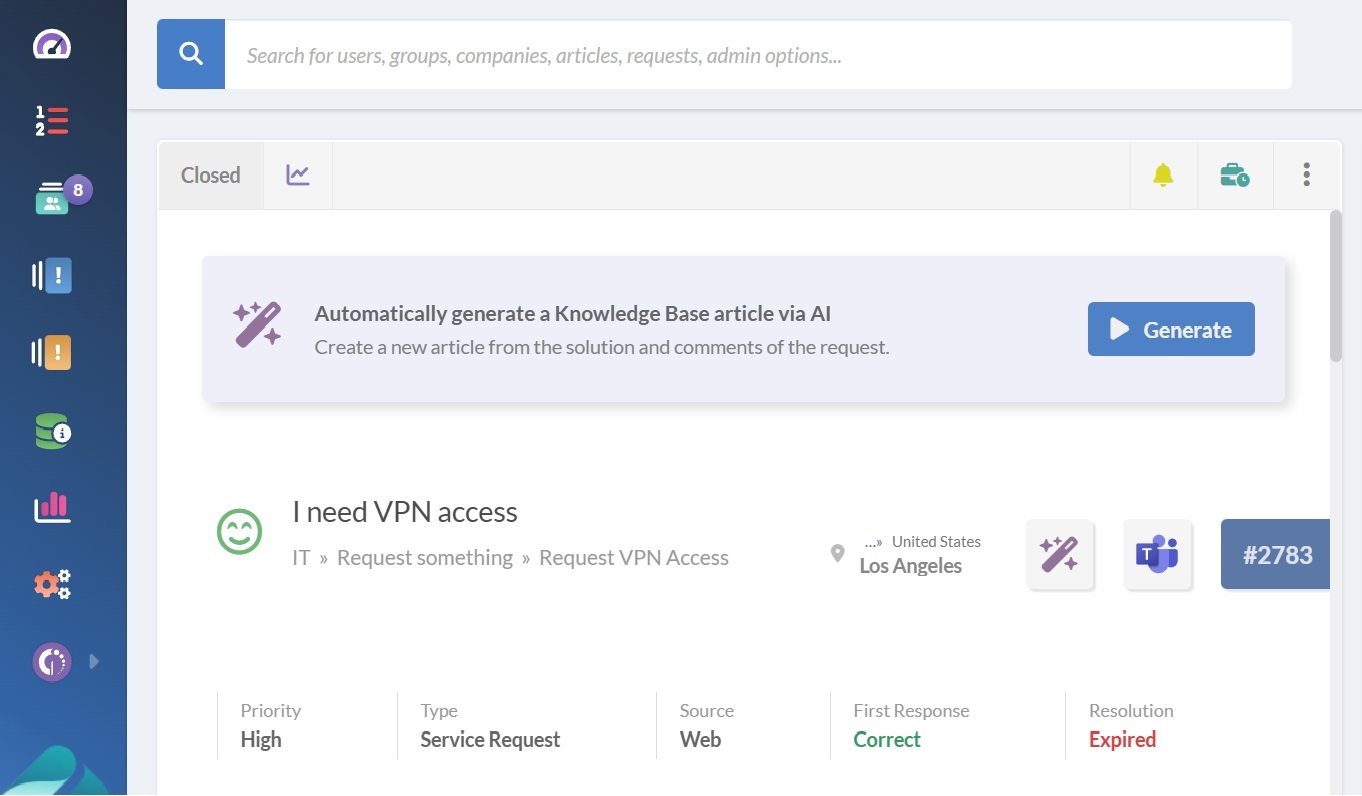
- Open a closed ticket and click on “Generate article.”
- Select which parts of the ticket communication you want included.
- The AI-powered draft will appear in the editor, ready to assign a category, set visibility, add images or links, and format the content.
- Review, save, and publish.
Once published, employees can search for the articles, read them, add them to favorites, download a copy, leave comments, or rate their usefulness.
#4. Enable the Virtual Service Agent (VSA)
The Virtual Service Agent gives employees real-time support. Instead of searching or guessing where to start, they can chat with the agent, which will suggest articles, guide them to the right catalog item, or even create a request automatically.
The VSA gives employees real-time support without having to submit a ticket. Because it interprets natural language, end-users can type in their own words and get help through:
- Article suggestions: The VSA connects to your knowledge base and recommends articles that match the employee’s request.
- AI-powered summaries: Users obtain quick AI-generated highlights of the most relevant information instead of reading through long documents.
- Consult with AI: If enabled, the Virtual Service Agent can provide answers pulled from external public sources through the InvGate AI Service. Users just need to select the "Consult with AI" option.
1. Connect the VSA to Microsoft Teams

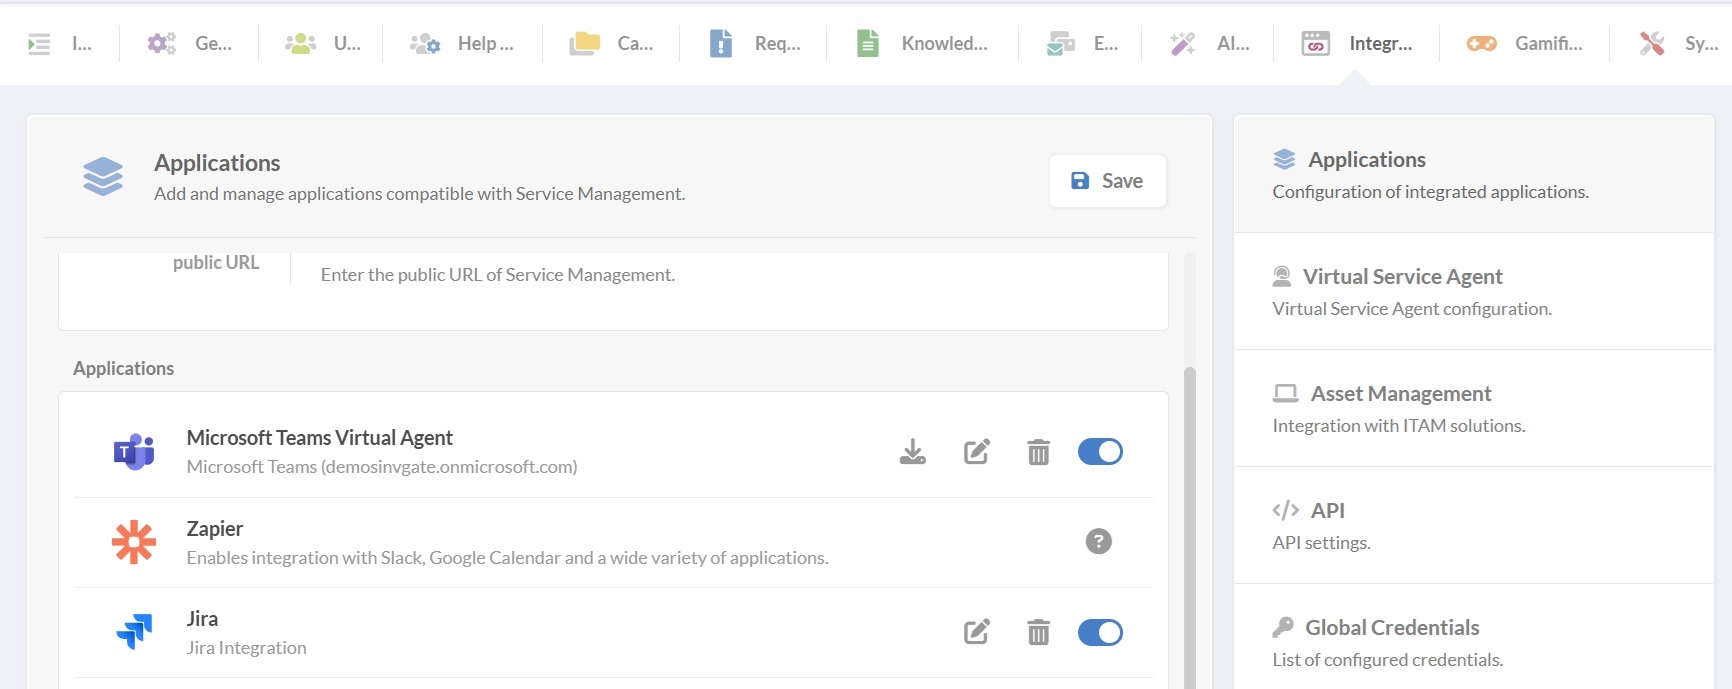
- Go to Settings > Integrations > Applications. There, you will choose Microsoft Teams and add your Entra Tenant ID.
- Next, click the download icon to get the InvGate Virtual Agent app.
- Finally, log in to Microsoft Teams and go to Apps > Manage my apps > Upload an app to upload the package.
2. Connect the VSA to WhatsApp
Before getting started, consider the prerequisites:
- Outgoing email must be configured in InvGate Service Management.
- A WhatsApp Business account with a phone number and payment method is required.
Configure the integration in InvGate Service Management.
- Go to Settings > Integrations > Applications and click Add.
- In the setup window, complete: Name, Enabled users, Credentials configuration (opens Meta setup, requires being logged into Meta in the same browser), WhatsApp Business PIN.
Configure credentials in Meta:
- Verify your identity in Meta, then click the "Continue as..." button.
- Connect your Meta account to InvGate and click Get started.
- Select or create a WhatsApp Business Account and profile.
- Accept the permissions and click on “Continue.”
- Add a payment method for Meta's services.
3. Enable AI features
To activate the VSA’s intelligent functionalities, log in as an administrator and go to Settings > AI Hub. Here you can enable:
- Article suggestions.
- Knowledge base summaries.
- AI-generated responses.
- Keyword generation.
Employees can interact with the VSA in two ways:
- Natural language: Simply typing “I can’t access the VPN” will trigger the agent to search the knowledge base and return relevant results.
- Commands: Employees can also use predefined commands for creating requests, viewing replies, or checking request status.
viewing replies, or checking request status. If a suitable article is found, it will be suggested directly in Teams. If not, the agent may look into external sources. And if no solution is available, the VSA offers to create a request automatically, suggesting the most relevant category to route it correctly.
Tip: Knowledge base content takes priority over external sources, so keeping articles updated and clear is key to making the most of tier 0 support.