How to design a software request process flow
A standardized process for software license requests helps organizations keep track of approvals, budgets, and license assignments without unnecessary delays.
With InvGate Service Management, you can automate the entire process – keeping requests consistent, approvals faster, and stakeholders informed.
#1. Set up the software request workflow

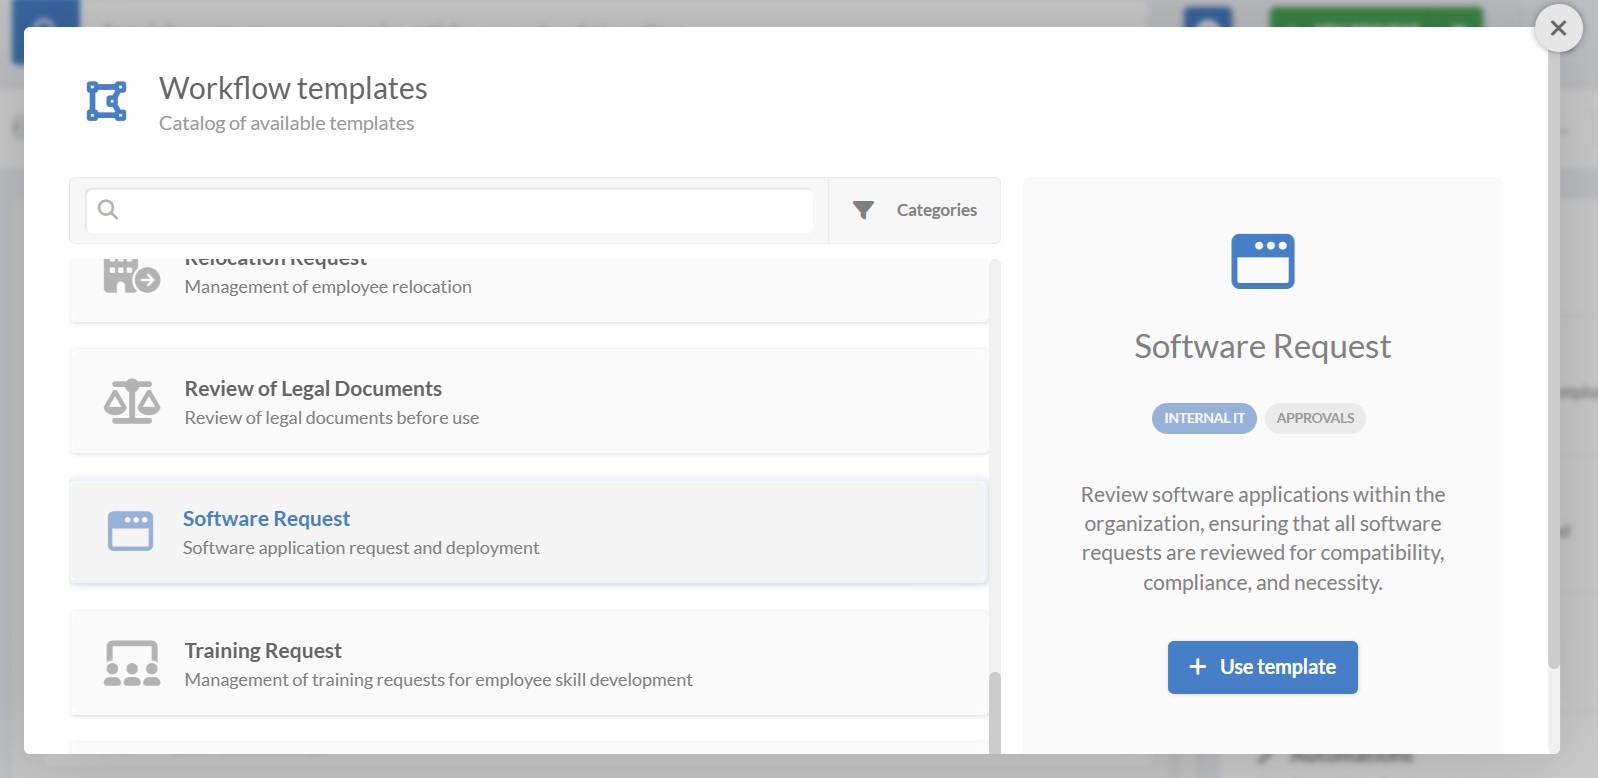
You can quickly launch a software request process by selecting the software request workflow template and adapting it to your needs (you can download the workflow template preview from here).
- Log in with an admin role and go to Settings > Requests > Workflows.
- Select the Software Request workflow from the list of templates.
- Click Use template to open it in the Diagram Editor.
If the template covers all your requirements, you can publish it right away. Otherwise, keep reading to customize it.
#2. Edit the software request process

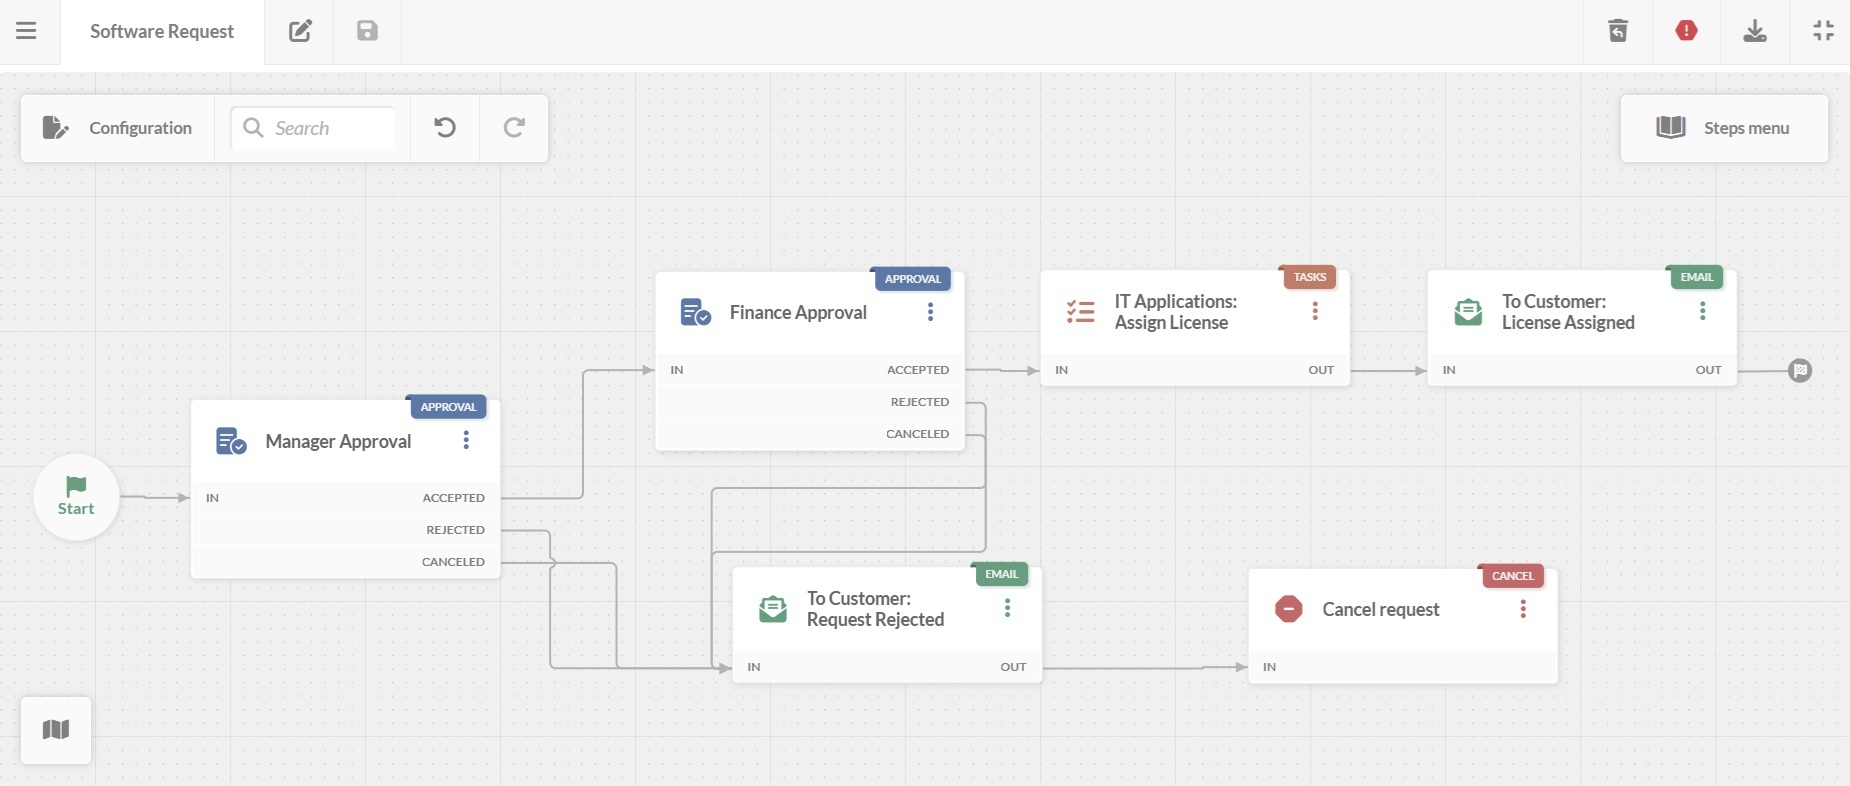
In the workflow diagram, you access the options that define how the workflow behaves, who manages it, and what users see.
You can double-click on any block to open its configuration and modify forms, tasks, approvals, and notifications.
Here’s what each stage does.
1. Start form
The process begins with a form where the requester provides:
- Software name (from a predefined list or free text).
- Reason for the request.
- Additional comments (e.g., required features, urgency)
Tip: You can add more fields, such as department, cost center, or license type to match your policies and reporting.
2. Manager approval
The manager reviews the request to confirm that the software is needed and fits the team’s budget and goals.
Possible outcomes:
- Accepted – The request moves to Finance approval.
- Rejected – The process moves to rejection notification email.
- Canceled – The process ends with a cancel notification email.
By default, an approval message is optional when accepted, but mandatory when rejected. This way, the rejection reason is always included in the email notification that follows.
3. Finance approval
If the manager approves, the request goes to the Finance team. They check for budget availability and licensing costs.
Outcomes:
- Accepted – The process continues to IT for license assignment.
- Rejected – The requester is notified by email that the license can’t be approved.
- Canceled – The requester is notified by email that the license request was canceled.
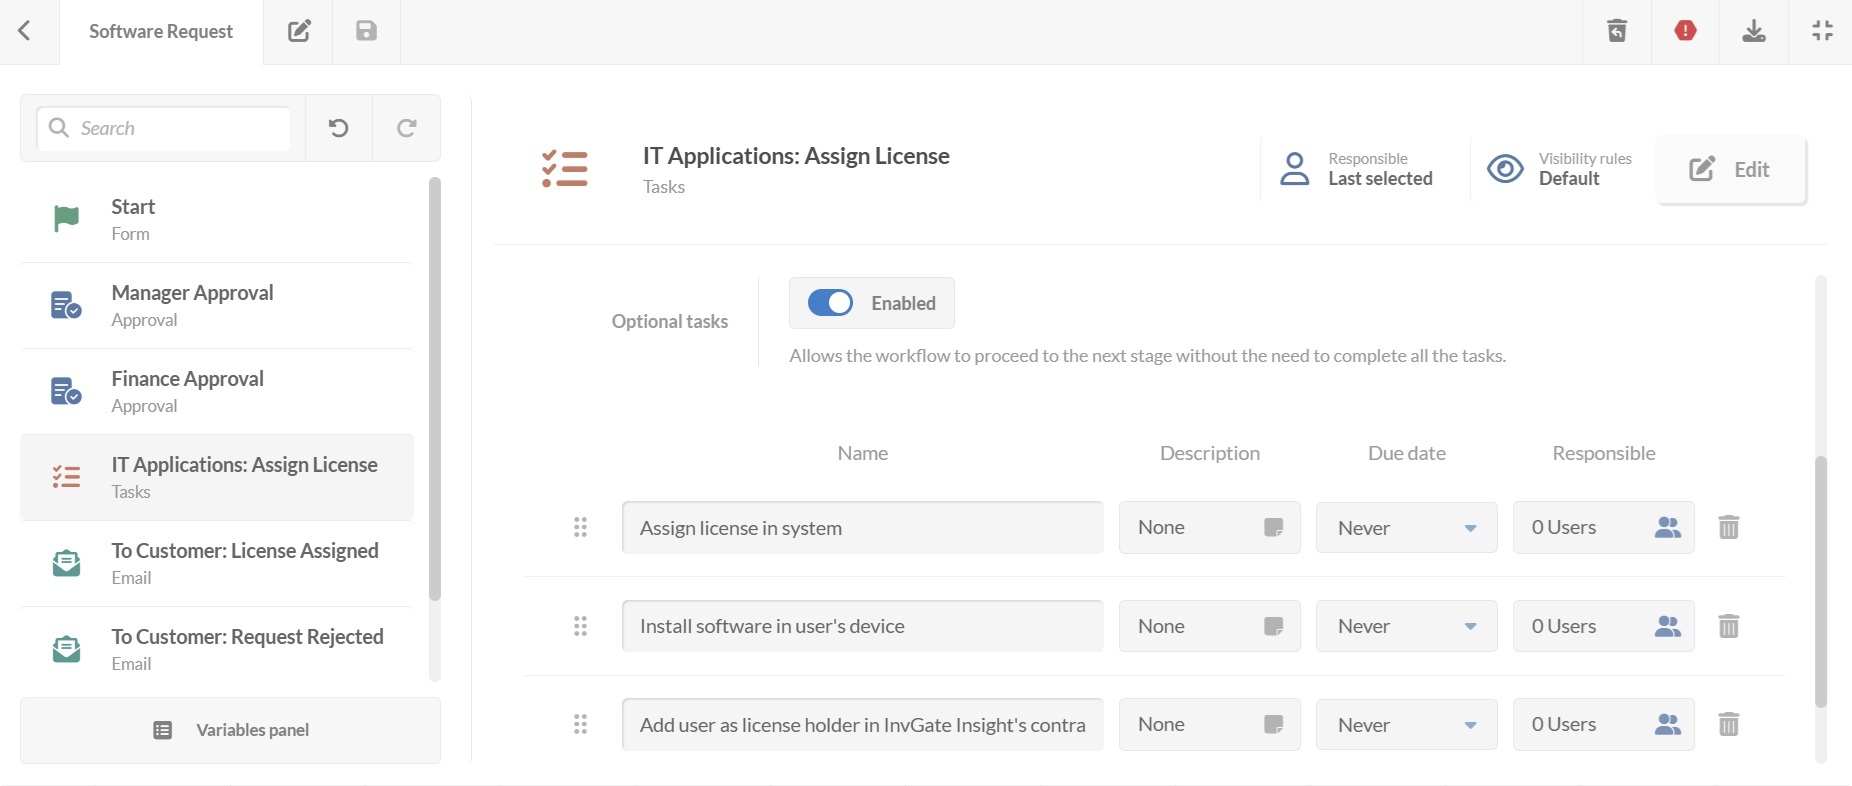
4. Assign license

The IT team receives the request with a list of tasks to complete. You can add as many tasks as you need. Each task can include a description, due date, and responsible person.
With the optional tasks toggle enabled, the workflow can move forward even if not all tasks are completed.
5. Notify requester – License assigned
Once the license is assigned, the requester automatically receives an email confirming the software is available.
Tip: You can configure the email to include additional details like license key, expiration date, or usage guidelines.
#3. Deploy the workflow
Once your software license request workflow is ready:
- Click on the save icon and return to the Workflows menu.
- Click on Publish version to activate the updated process.
- Assign the workflow to a request category on the service catalog, such as IT > Software requests.
- Click Assign now.
From that point on, any request in that category will follow the defined workflow.