8 service desk automation ideas you need to apply ASAP
Every service desk has repetitive requests that drain time from your team. Software requests, provisioning accounts, or routing tickets are common examples. Automating saves effort and guarantees consistency, prevents missed steps, and improves the experience for both employees and IT staff.
Keep reading to learn about practical service desk automations that you can set up right now in InvGate Service Management.
#1. Software request automation
Standardize software requests starting with a software request form where employees select the application they need, state the reason, and submit. Then, automation handles approvals, license availability checks, and assignment.
You can quickly launch an automated process by selecting the software request workflow template and adapting it to your needs.
To get started:
- Log in with an admin role and go to Settings > Requests > Workflows.
- Select the Software Request workflow from the list of templates.
- Click Use template to open it in the Diagram Editor.
In the workflow diagram, each block can be double-clicked to adjust its configuration. You can modify forms, approvals, tasks, and notifications to align with your procedures.
For example, the Start form might include fields for:
- Software name (from a predefined list or free text).
- Reason for the request.
- Additional comments (such as required features or urgency).
#2. Onboarding and offboarding workflows
Automating onboarding ensures new employees have everything ready on their first day, while automating offboarding guarantees nothing gets missed when someone leaves the organization. Both processes benefit from consistency, compliance, and a better overall experience.
You don’t need to build these workflows from scratch — InvGate Service Management includes pre-built templates for both onboarding and offboarding that you can adapt to your environment.
To get started:
- Log in with an admin role and go to Settings > Requests > Workflows
- Select the Employee Onboarding or Employee Offboarding workflow template.
- Click Use template to open it in the Diagram Editor.
In the workflow editor, you can double-click on each block to modify forms, approvals, and tasks:
Onboarding example

- The start form might include employment type, manager, location, and role.
- HR approval confirms the new hire and triggers HR tasks (e.g., I-9 form collection).
- IT tasks handle account creation, email setup, and equipment provisioning (laptops, phones, software bundles).
- Facilities tasks can cover access badges and workspace setup.
Offboarding example

- Start form captures employee details and termination date.
- HR tasks may include scheduling the exit interview and closing administrative records.
- Facilities tasks remove building access and security permissions.
- IT security tasks disable accounts and system access.
- IT Asset Management tasks retrieve company equipment (with approval and documentation).
#3. Ticket routing and escalation
Routing rules in InvGate Service Management can automatically assign tickets based on criteria like category, affected application, or user location. Escalation rules take it a step further by moving tickets up a level if needed.
Let’s see, for example, an outage alert.
- Go to Settings > Requests > Automations and click Add.
- Define Name, Description, and Event.
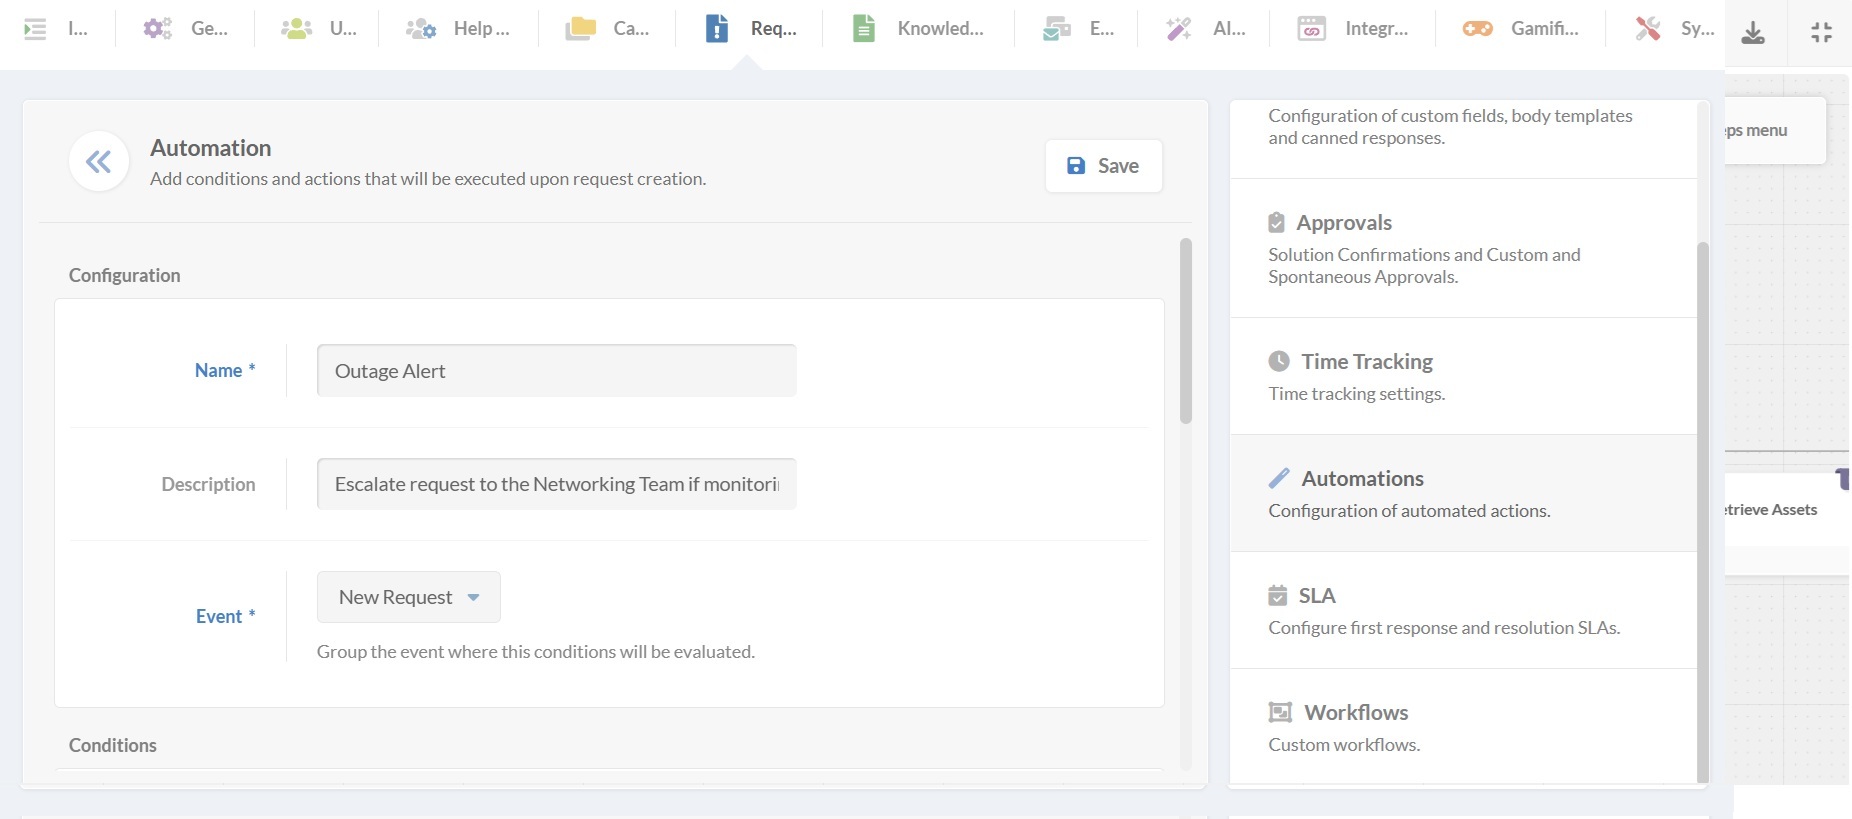
- Next, you’ll define conditions and the actions to be taken if they’re met.
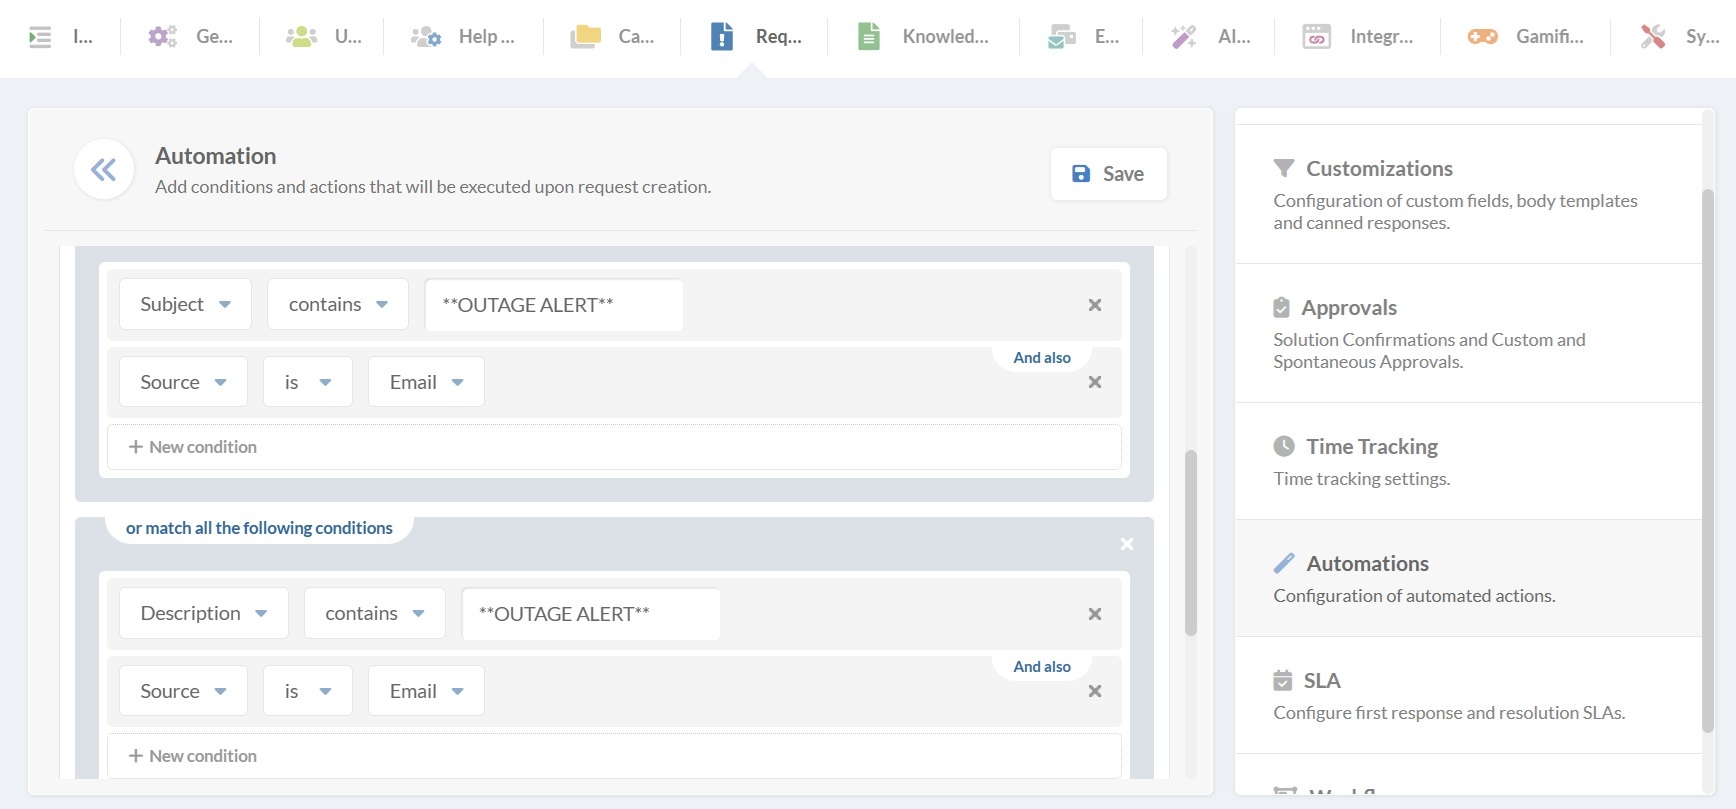


In our example, if we receive an email containing “outage alert” in the subject, it will trigger a change of category to the right type of request, a change of priority to critical since it disrupts work, and add an observer automatically.
Other available actions include:
- Add tasks to be completed.
- Reassign the request to another agent or team.
- Reject or reopen a request.
- Send an email to selected recipients.
- Trigger an approval workflow.
- Call an external web service.
#4. Ticket reply suggestions with AI

AI support features make communication faster and more consistent. Under the agent’s reply box, you’ll find a small wand icon and beside it all the AI assistance options:
- Improved responses: Agents can start with their own draft, and then use Generative AI to refine it. Options include summarizing, expanding, refining the answer, or adjusting the tone.
- AI-generated responses: Instead of drafting from scratch, agents can let the system propose a reply. These can be recommended solutions, follow-ups, or requests for more details. Then, the agent can simply review and adjust before sending it.
#5. Canned responses
Canned responses let agents reply faster during request resolution. They can include request variables (to pull in details automatically) and be restricted to specific categories or help desks.
There are two types of canned responses:
- Shared canned responses: Created by admins, assignable to help desks or request categories.
- Personal canned responses: Created and managed by each agent, available only to them.
Creating a shared canned response

- Go to Requests > Customizations and scroll down to Canned responses.
- Click Add.
- Fill in the fields:
- Name
- Help desks affected
- Categories affected
- Content – You can insert variables that will be replaced dynamically with request values.
- Click Save.
Creating a personal canned response
- Go to your profile picture > Options > Canned responses.
- Click New canned response.
- Fill in the fields: Text and Name.
- Click Save.
#6. Customer satisfaction surveys
With InvGate Service Management, you can automate CSAT surveys at ticket closure. A simple 1–5 star scale plus an optional comment box gives you measurable input from end users without adding friction to the process.
This is part of solution confirmations. You’ll find this option under Requests > Approvals > Solution confirmation.
If enabled, the requester has to confirm the solution and provide a satisfaction rating. You can also configure exceptions by selecting categories where requests can be closed without waiting for customer approval.
Keep in mind that if a customer rates the solution three stars or less, they are required to include a comment in the confirmation step.
#7. SLA monitoring
By default, InvGate tracks metrics like first response time, communication intervals, and resolution duration, displaying them directly to agents in their ticket view.
But SLA monitoring isn’t just about tracking — you can also set actions to trigger at certain points during the SLA countdown automatically. For example:
- Send an email notification to the requester or manager.
- Add observers to the ticket.
- Reassign the request to another agent or group.
These automations help ensure issues are handled before deadlines are missed.
To configure Actions go to Settings > Requests > SLAs and click edit on the SLA. There, you can scroll down to “Actions” and click “Add.”

There, you complete the elapsed time field with a percentage of the time and an action to perform. The Actions that can be triggered at different times include adding an observer, changing category, changing priority, triggering approvals, sending an email, and more.
Tip: Reports on SLAs can also be scheduled to run automatically. See the next section.#8. Periodic reports automation

With scheduled reports, you can automatically send snapshots of ticket volumes, SLA compliance, or satisfaction ratings to managers and stakeholders. Reports can be delivered daily, weekly, or monthly, making sure decision-makers always have up-to-date insights.
To set this up, go to Reports and create one in the New tab. Once created, it will appear under My reports, where you’ll see a clock icon. Click the icon to configure scheduling — choose the recipients, the frequency, and the time the report will be sent.