How to create a Project Management workflow
A well-structured Project Management process keeps work organized, aligns stakeholders, and ensures projects move from proposal to completion without losing momentum.
By mapping each step and automating tasks, approvals, and notifications, you can make sure every project is documented, reviewed, and delivered according to plan.
With InvGate Service Management, you can set up a workflow that guides your team from the first idea to the final delivery, while keeping everyone informed along the way.
#1. Set up the Project Management workflow

The quickest way to start is by selecting the Project Management workflow template and adapting it to your requirements (you can download the Project Management workflow template preview from here).
- Log in with an admin role, then go to: Settings > Requests > Workflows
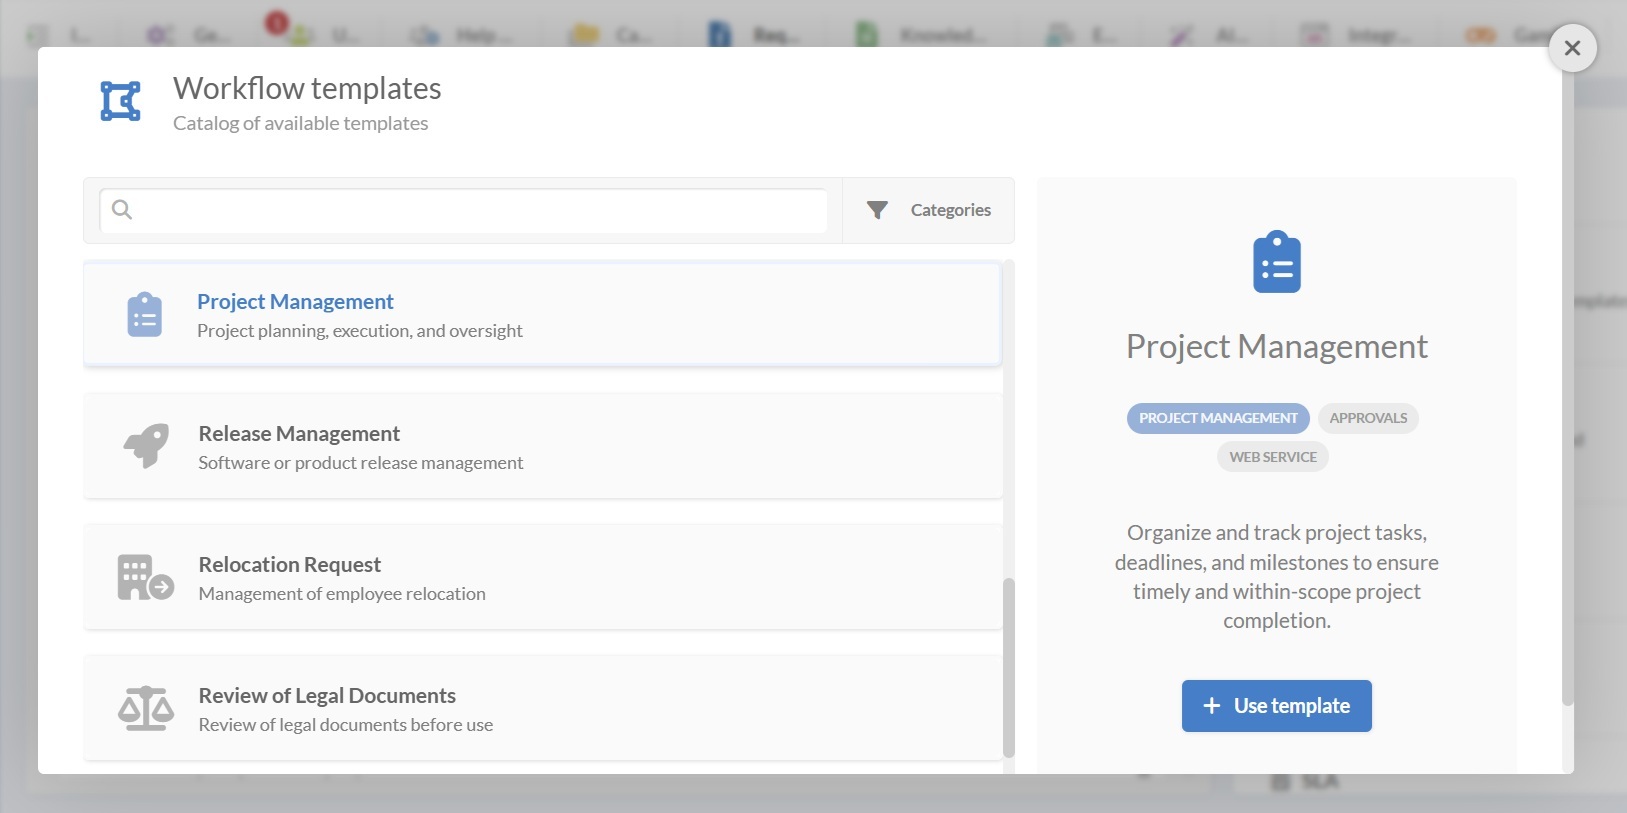
- Select the Project Management workflow from the list of templates.
- Click Use template to open it in the Diagram Editor. Here, you can view and configure each step of the process.
Tip: From Settings > Requests > Workflows, you can also create new ones from scratch (by clicking on “Add”), import workflows with the .sdw extension, or view and edit existing ones.
If the template is enough for your needs, you can use it as it is. If you need to tweak it, keep reading.
#2. Edit the Project Management workflow template

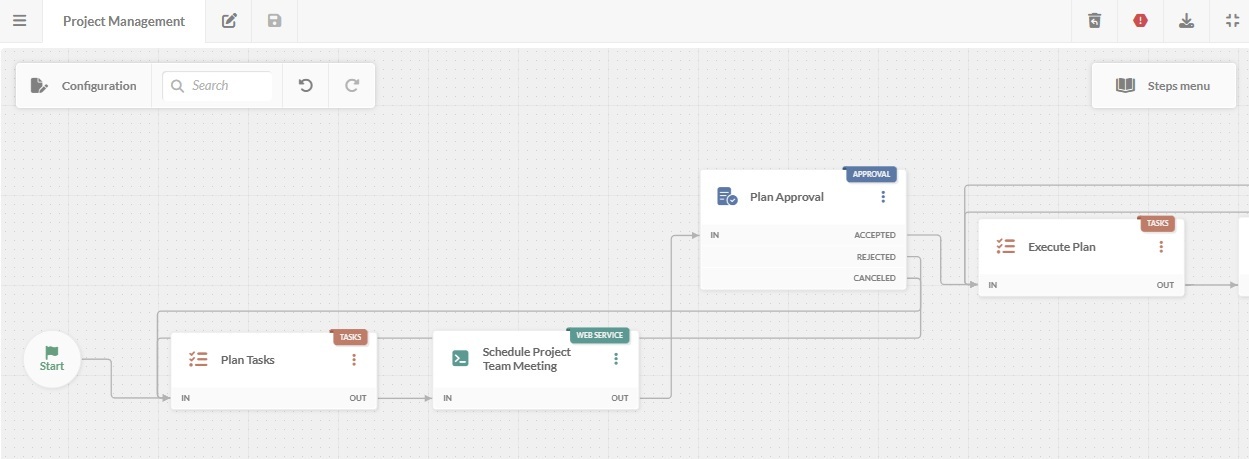
You can double-click on any block in the diagram to edit forms, tasks, approvals, and automation. Below is the recommended flow and how each stage works.
1. Start form
The process begins with a form to gather the initial details of a project proposal.
Default fields:
- Project name.
- Project description.
- Start date.
- End date.
- Project Manager.
2. Plan tasks
In this step, you outline the activities needed to prepare the project plan. This may include identifying required resources, gathering initial data, and determining who should be involved in the planning process.
3. Schedule a project team meeting
The workflow automatically schedules a meeting with the project team through an integration with your calendar tool. This ensures the meeting is booked promptly so the team can work on the final project plan.
4. Plan approval
After the team meeting, the project plan goes through a formal approval process.
Approval outcomes:
- Accepted – The plan is approved and moves to execution.
- Rejected – The plan needs revisions and goes back to the plan tasks step.
- Canceled – The plan is stopped due to shifting priorities or other issues.
5. Execute plan

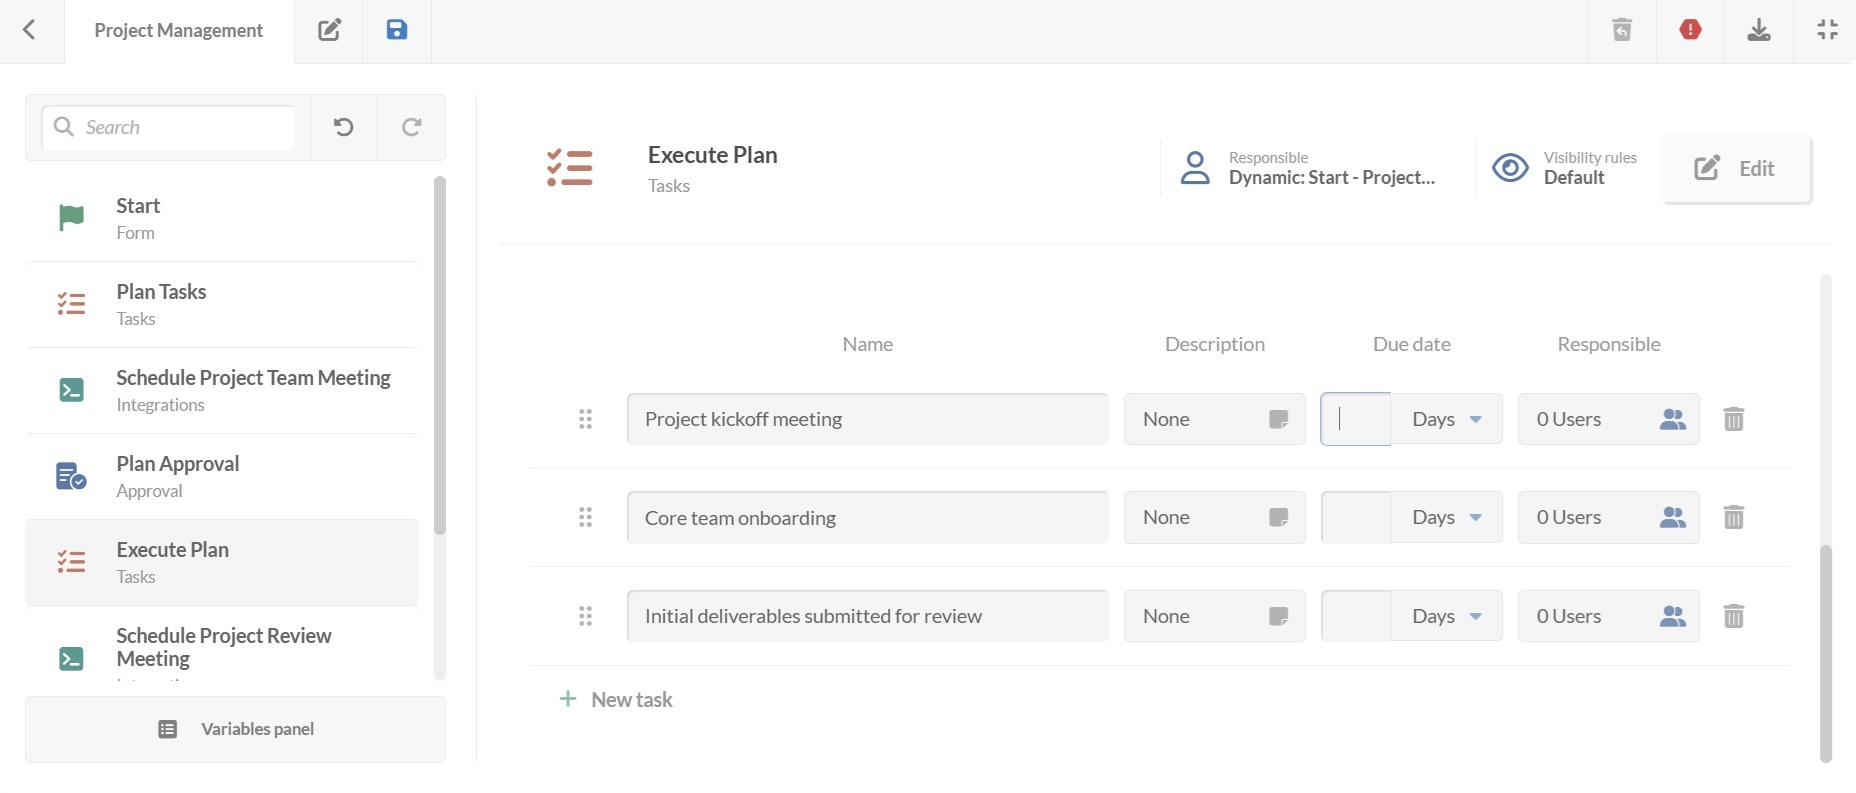
A Tasks block contains all the activities defined in the approved plan. Each task can include:
- Description.
- Due date.
- Responsible person.
By default, all tasks must be completed before moving on, but you can make them optional if needed.
Tip: Using the task creation toggle, you can allow users to add new tasks while the workflow is running, in case unplanned activities arise.
6. Schedule project review meeting
Again, using the calendar integration, the workflow automatically books a review meeting to assess progress, address risks, and plan any necessary adjustments.
7. Final approval
Following the review, a final decision confirms whether the project can move toward completion.
Approval outcomes:
- Accepted – The project proceeds to finalization.
- Rejected – The project requires adjustments and returns to the execution plan step.
- Canceled – The project is stopped due to misalignment or other issues.
8. Email – project finished
Once approved, the workflow sends an automated notification to all relevant stakeholders confirming that the project is complete. You can customize the email content to include a summary of outcomes, achievements, and next steps.
#3. Publish your Project Management workflow
Once your Project Management workflow is ready:
- Click on the save icon and return to the Workflows menu.
- Click on Publish version to activate the updated process.
- Then, assign it to the relevant request category in your service catalog – for example, Projects under the PMO or IT department.
- Click Assign now.
From then on, every Project Management request will follow the same clear, consistent process.