How to create a Knowledge Management workflow (creation and update)
With InvGate Service Management, you can build workflows to handle both the creation of new knowledge articles and the update of existing ones. That means you can keep your knowledge base accurate, consistent, and easy to maintain – while making the process clear for everyone involved.
#1. Set up the knowledge article workflow

InvGate Service Management includes ready-to-use templates for two types of knowledge workflows:
- Article creation – for drafting, reviewing, and publishing new content.
- Article update – for making and validating changes to existing content.
There’s a simple way to set up either workflow: just select it and customize it to your needs (you can download previews for these workflow templates from here):
- Log in as an administrator and go to Settings > Requests > Workflows.
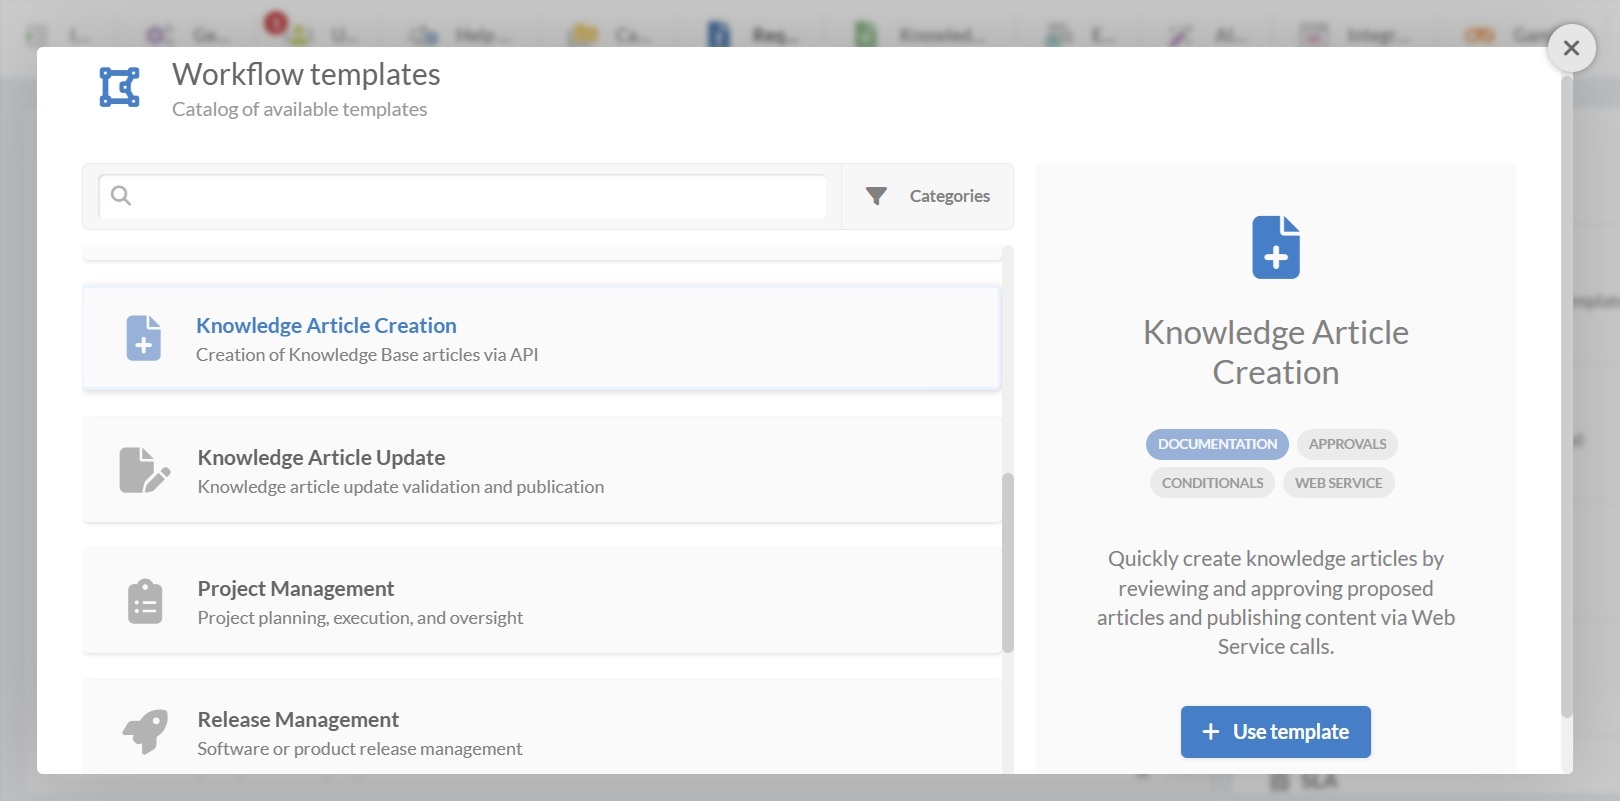
- Select either the Knowledge Article Creation or Knowledge Article Update workflow from the list of templates.
- Click Use template to open it in the Diagram Editor.
Tip: From this same menu, you can also create a workflow from scratch, import one in .sdw format, or edit existing workflows.
If the templates are sufficient for your needs, you can use them as is. If you need to tweak them, keep reading to learn how to edit them.
#2. Edit the Knowledge Management workflow templates
In the Diagram Editor, each block will represent a step. You can double-click on any block to configure its form, tasks, or approval rules.
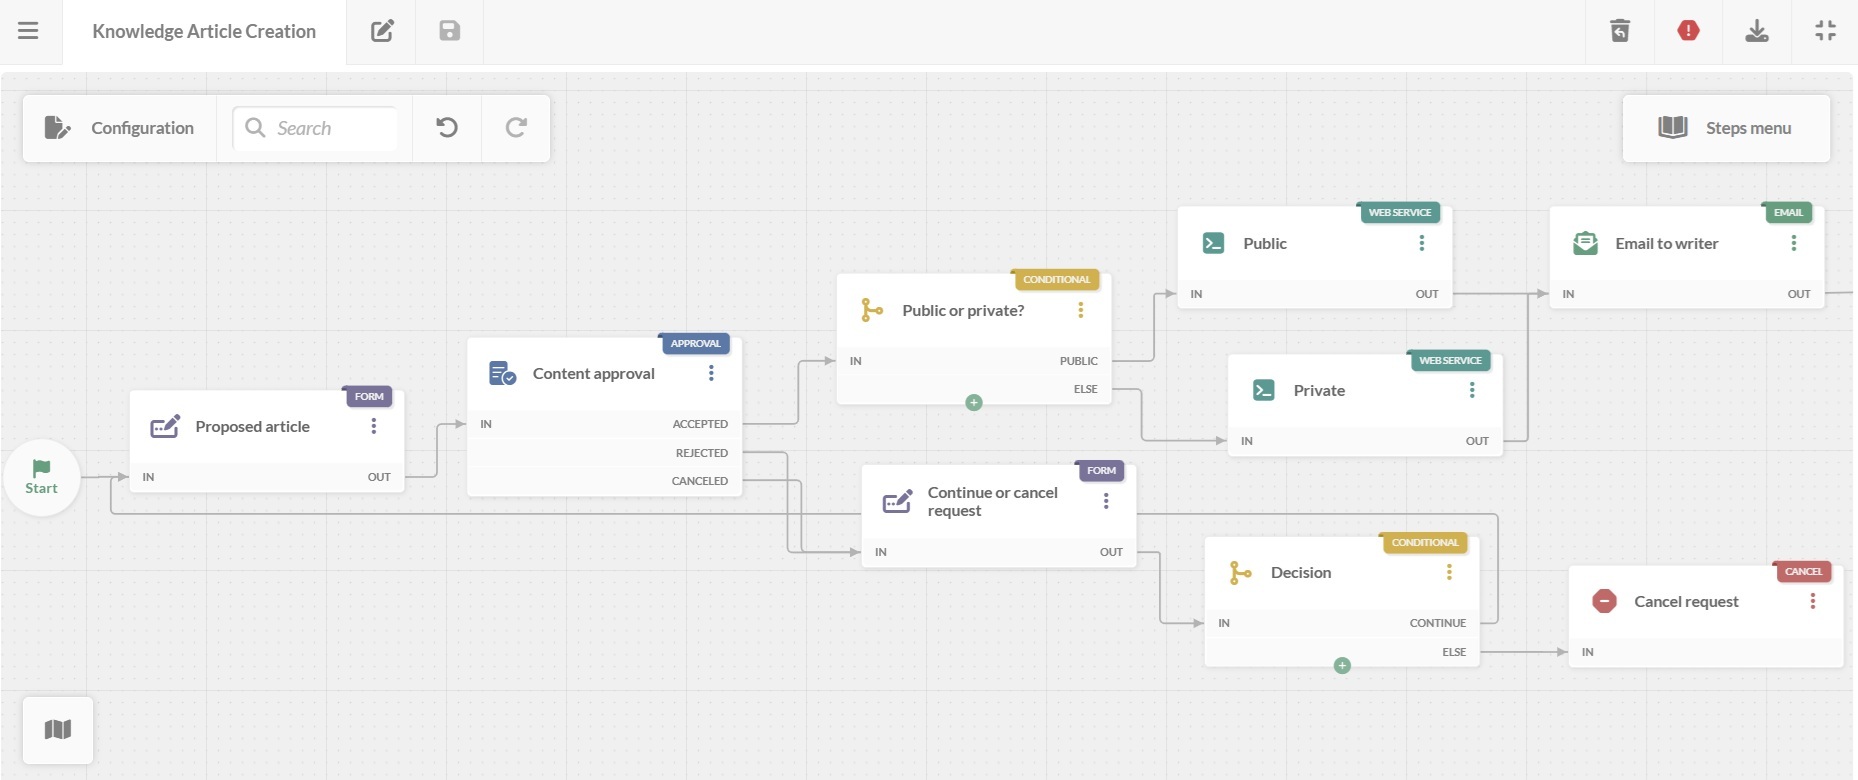
Knowledge article creation - Workflow template

Use this workflow to manage article proposals from users.
Here’s what each step does:
- Start form – The process begins with a form where the author proposes the article with a simple description.
- Proposed article submission form – Here, users will submit the article title and full body of text. They will also define whether the article is intended for public or private publication.
Tip: If you often create similar types of articles, use dropdowns for fields like “Category” or “Audience” to keep entries consistent.
- Content approval – Reviewers check the article for accuracy, clarity, and relevance. Approval outcomes:
- Accepted – Moves to the publication phase.
- Rejected – Goes to a “Continue” or “Cancel” form.
- Canceled – Goes to a “Continue” or “Cancel” form.
- Continue or cancel form – The reviewer chooses whether to send the article back for edits or close the request.
- Continue – Loops back to the “Start form” so the author can make changes and resubmit.
- Cancel – Ends the workflow.
- Public or private publication (conditional block) – Routes the article to the correct publishing method:
- Public – Publishes for all users.
- Private – Publishes for specific groups or internal audiences only.
- Publication web service – Sends the approved article to the correct section of the knowledge base.
- Email notification to writer – Sends a status update to the author with publication details or next steps.
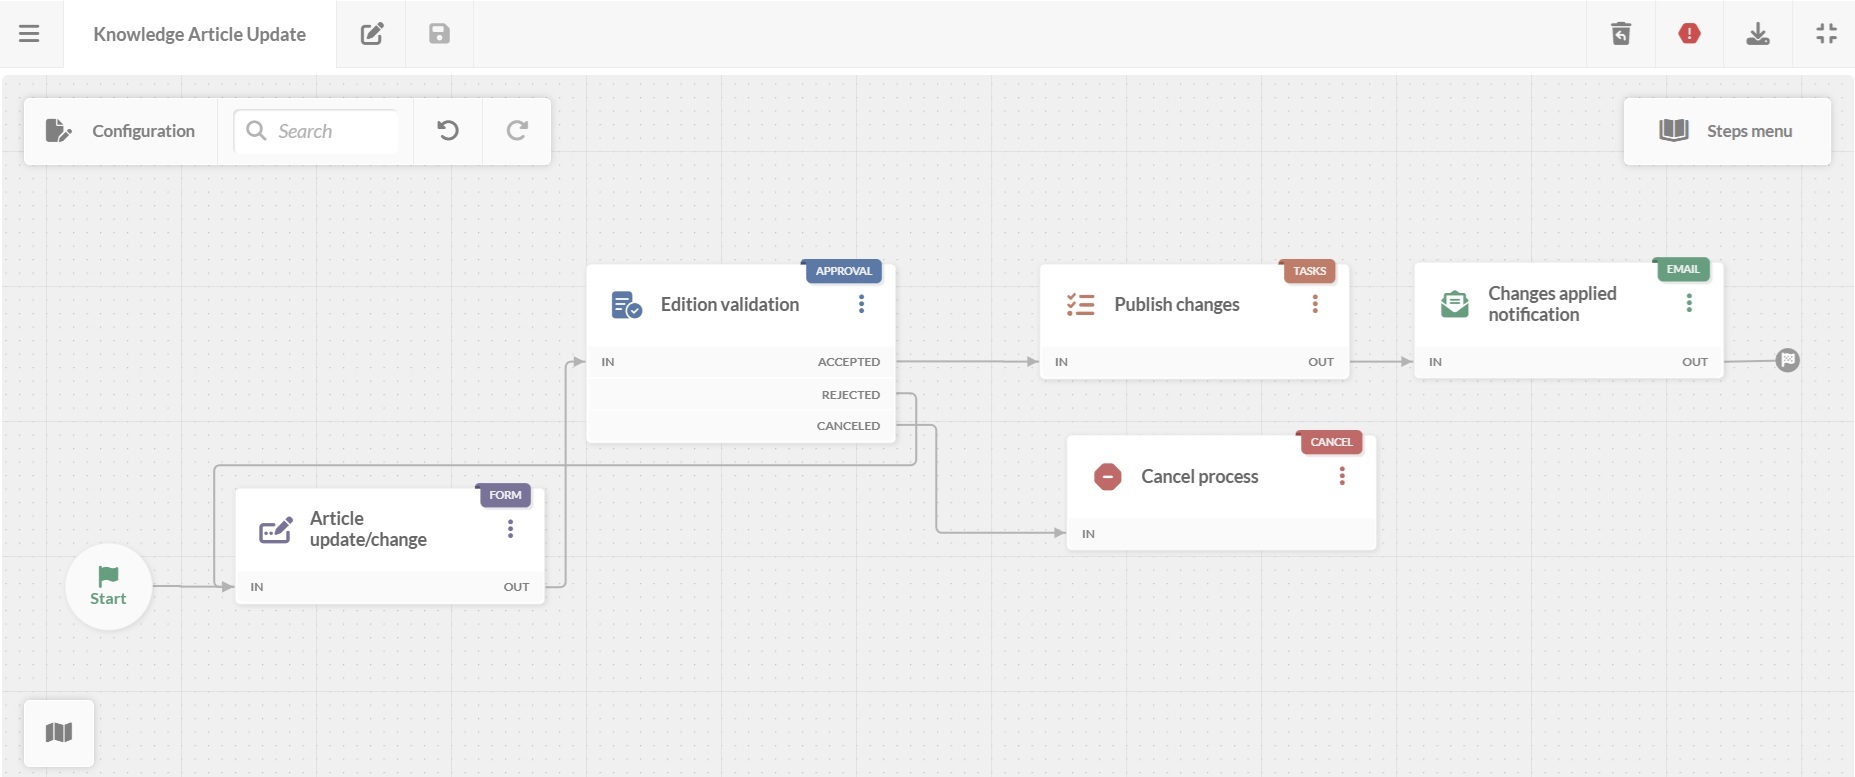
Knowledge article update - Workflow template

Use this workflow to manage article revisions in a structured way.
Here’s how the steps work:
- Start form – Collects:
- The URL of the article to be updated.
- The person responsible for the article.
- A summary of the modifications needed.
- Article update/change form – Pulls information from the start form and adds:
- Space for detailed update instructions.
- A checkbox for the responsible person to confirm whether the changes have been applied.
Tip: If you want to make updates collaborative, add fields for multiple contributors or attach reference materials.
- Edition validation (approval block) – A reviewer verifies the changes:
- Accepted – Goes to the “Publish changes” step.
- Rejected – Loops back to the “Article update/change form” for corrections.
- Canceled – Ends the workflow.
- Publish changes – Includes a list of tasks to publish the approved changes.
- Changes applied notification – Sends the author an email confirming the update and providing any extra details.
#3. Deploy the workflow
Once your creation or update workflows are ready:
- Click on the save icon and return to the Workflows menu.
- Click on Publish version to activate the updated process.
- Assign the workflow to a category on the service catalog — for example, IT > Knowledge Management > Article creation.
- Click Assign now.
From now on, all requests from that category will follow the updated process.