How to organize your work as a service desk agent
Service desk agents often spend entire shifts in their ITSM tool. InvGate Service Management is designed to make that work easier, helping agents take action quickly and stay organized.
From tracking tickets to collaborating with teammates, the Agent View gives you everything in one place.
#1. See the big picture with dashboards

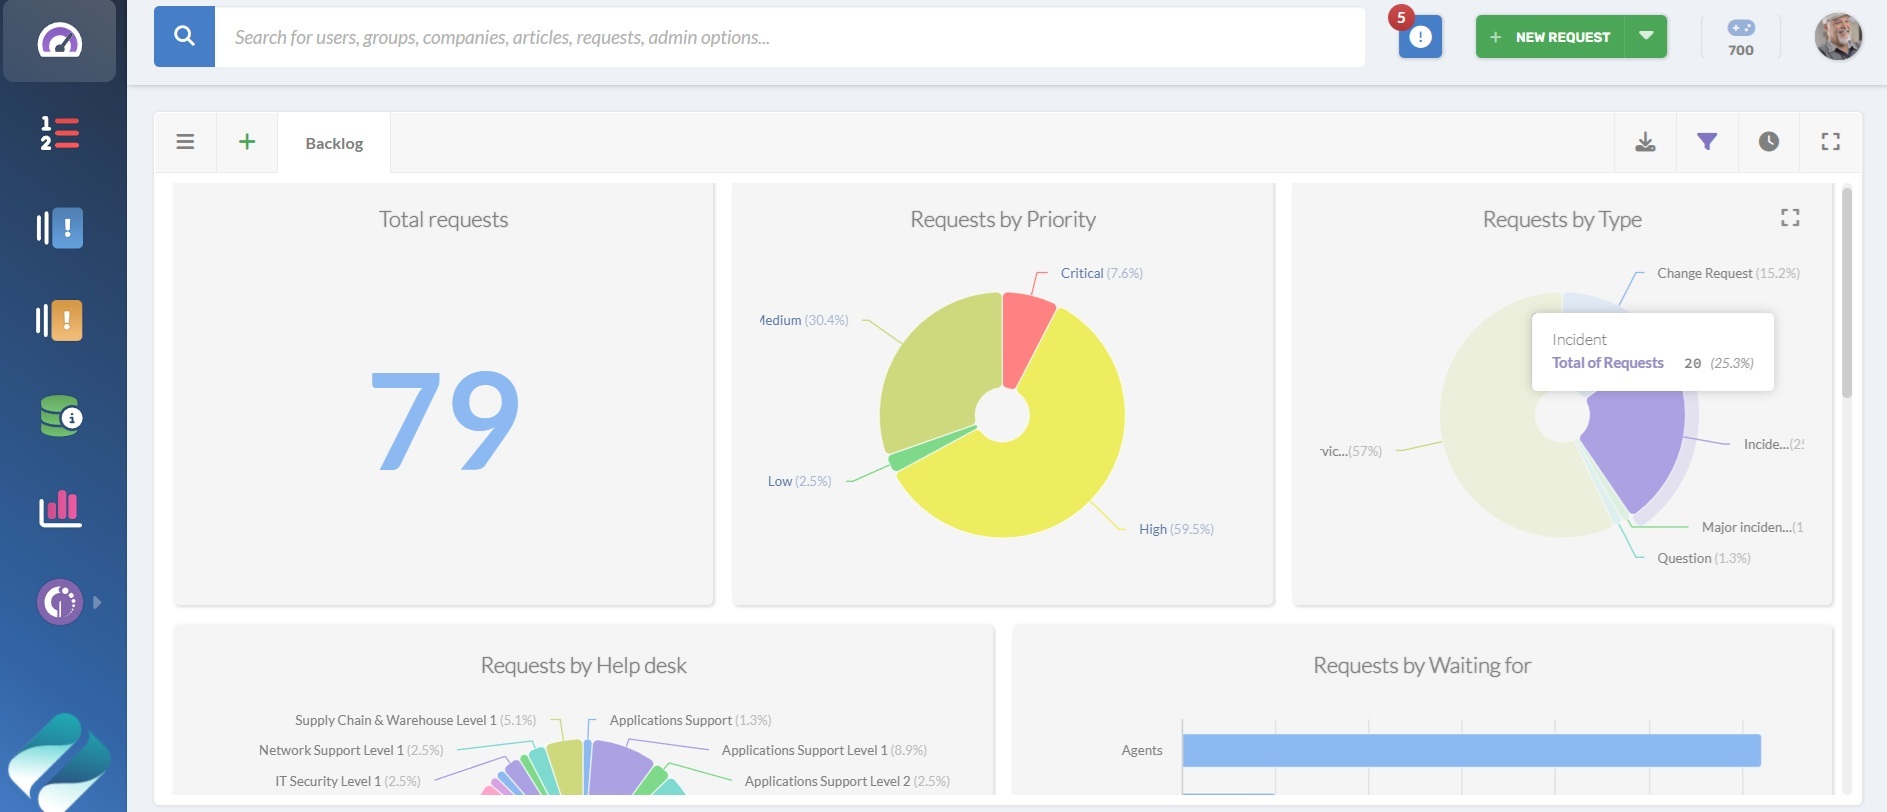
Dashboards let agents visualize work across requests, SLAs, and customer feedback in a single view. You can customize dashboards by adding rows, columns, and charts that match your priorities.
How to use dashboards:
- Go to the Dashboard section.
- Acesse a seção Painel.
- Add widgets for metrics like open tickets, SLA timers, or customer satisfaction.
- Save and share your dashboard with colleagues, even those without a license.
#2. Prioritize work

The My Work section brings together everything an agent is responsible for in one place. It’s designed to highlight what needs attention right now and give you the tools to act without leaving the screen.
Requests are grouped into categories so you can focus on what matters:
- Waiting for me: Tickets where your response is required.
- Assigned to me: Requests currently in your queue.
- Approvals: Items that need your sign-off.
- Tasks: Subtasks linked to larger requests.
- Collaboration: Cases where you’re involved with other agents.
- Unassigned: Requests that don’t yet have an owner.
Each request appears as a card with a quick overview of the case. Using the configuration wheel on the card, you can update statuses, add comments, or take other actions directly from this screen. At the top, you’ll find a search bar and multiple filter options to narrow down results.
On the right side, there’s a section that highlights pending actions and upcoming deadlines — like tasks, reminders, or expiring approvals — so you always know what’s most urgent.
Tip: Use the filters to sort by urgency and focus on high-priority items first, while keeping upcoming tasks and approvals in sight.#3. Work efficiently inside tickets

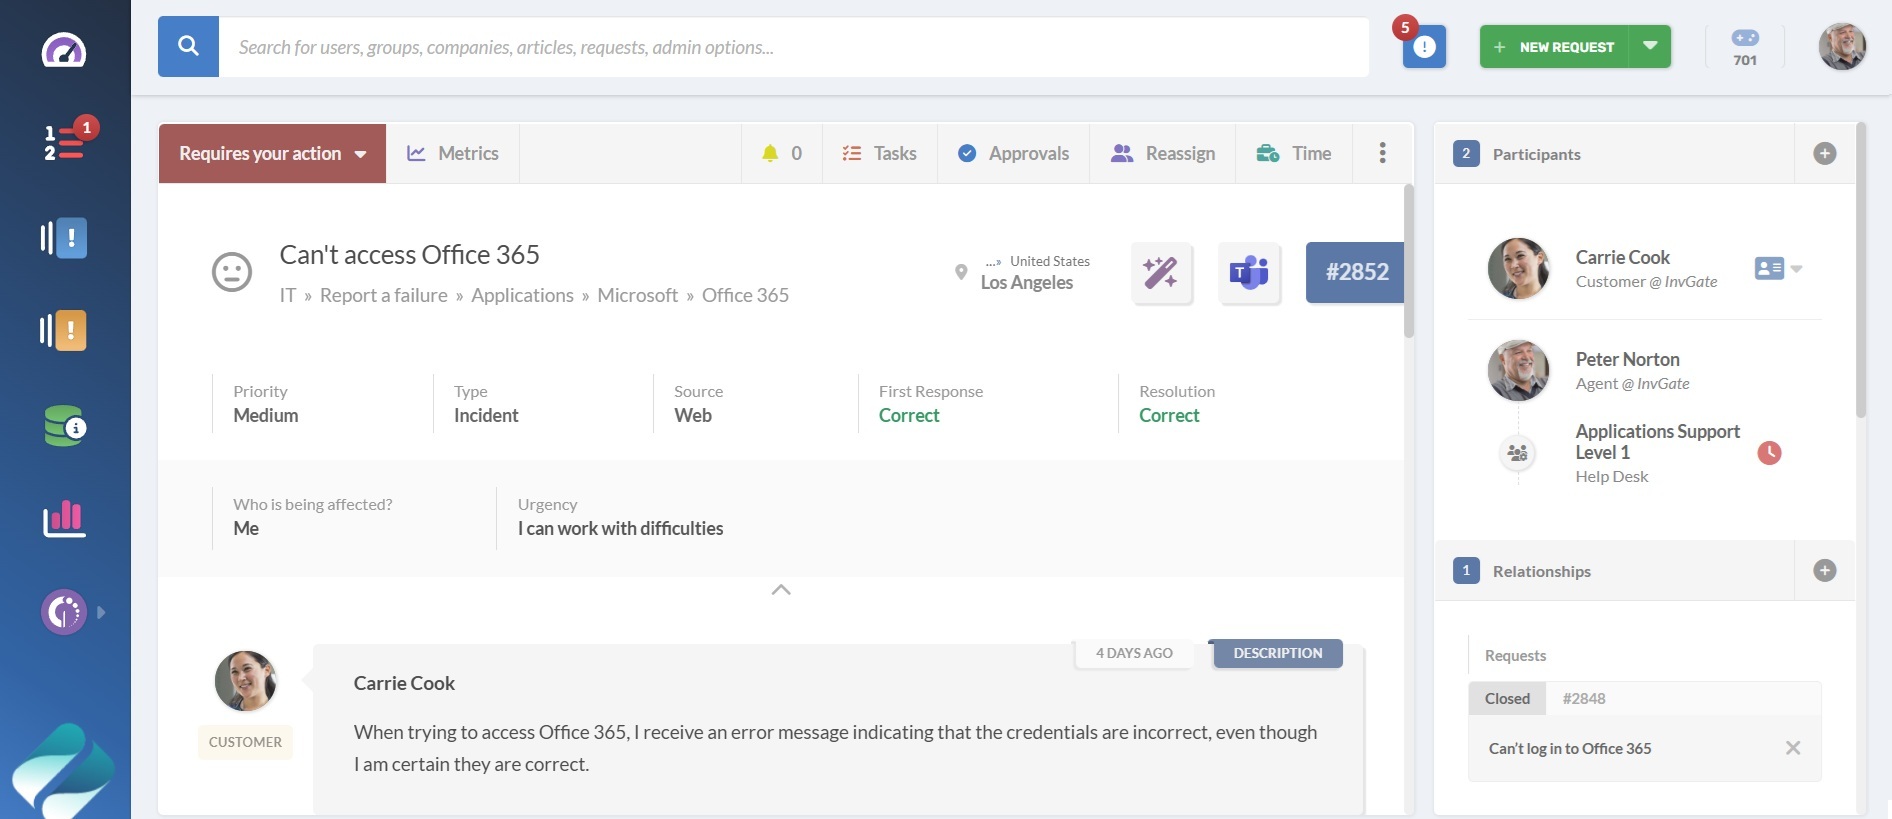
The ticket detail view includes all the information you need to resolve a request gathered in a single screen, with quick actions to keep work moving forward.
Key options inside a ticket include:
- Metrics: See who has handled the ticket and for how long.
- Reminders: Schedule alerts to return to the ticket at a specific time.
- Tasks: Break down work into smaller steps, assign them to teammates or yourself, and set due dates.
- Approvals: Request sign-offs for purchases or critical decisions.
- Reassign: Transfer tickets to another team or colleague, adding internal comments for context.
- Time: Log time spent with descriptions and optional start/end times.
Below the ticket details, you’ll find the conversation panel for communicating with the customer. You can also check a box to add internal comments instead.
Attachments, images, knowledge articles, and canned responses are available to speed up replies. Canned responses make it easy to send clear, consistent messages without rewriting common answers. For additional support, click the wand icon to access AI features that generate or refine ticket responses.
At the bottom, you’ll see a history of all actions taken on the ticket. On the right, there’s always a panel showing:
- People involved in the ticket.
- Related requests and entities.
- Linked configuration items (CIs).
- Knowledge base article suggestions.
#4. Organize and filter tickets

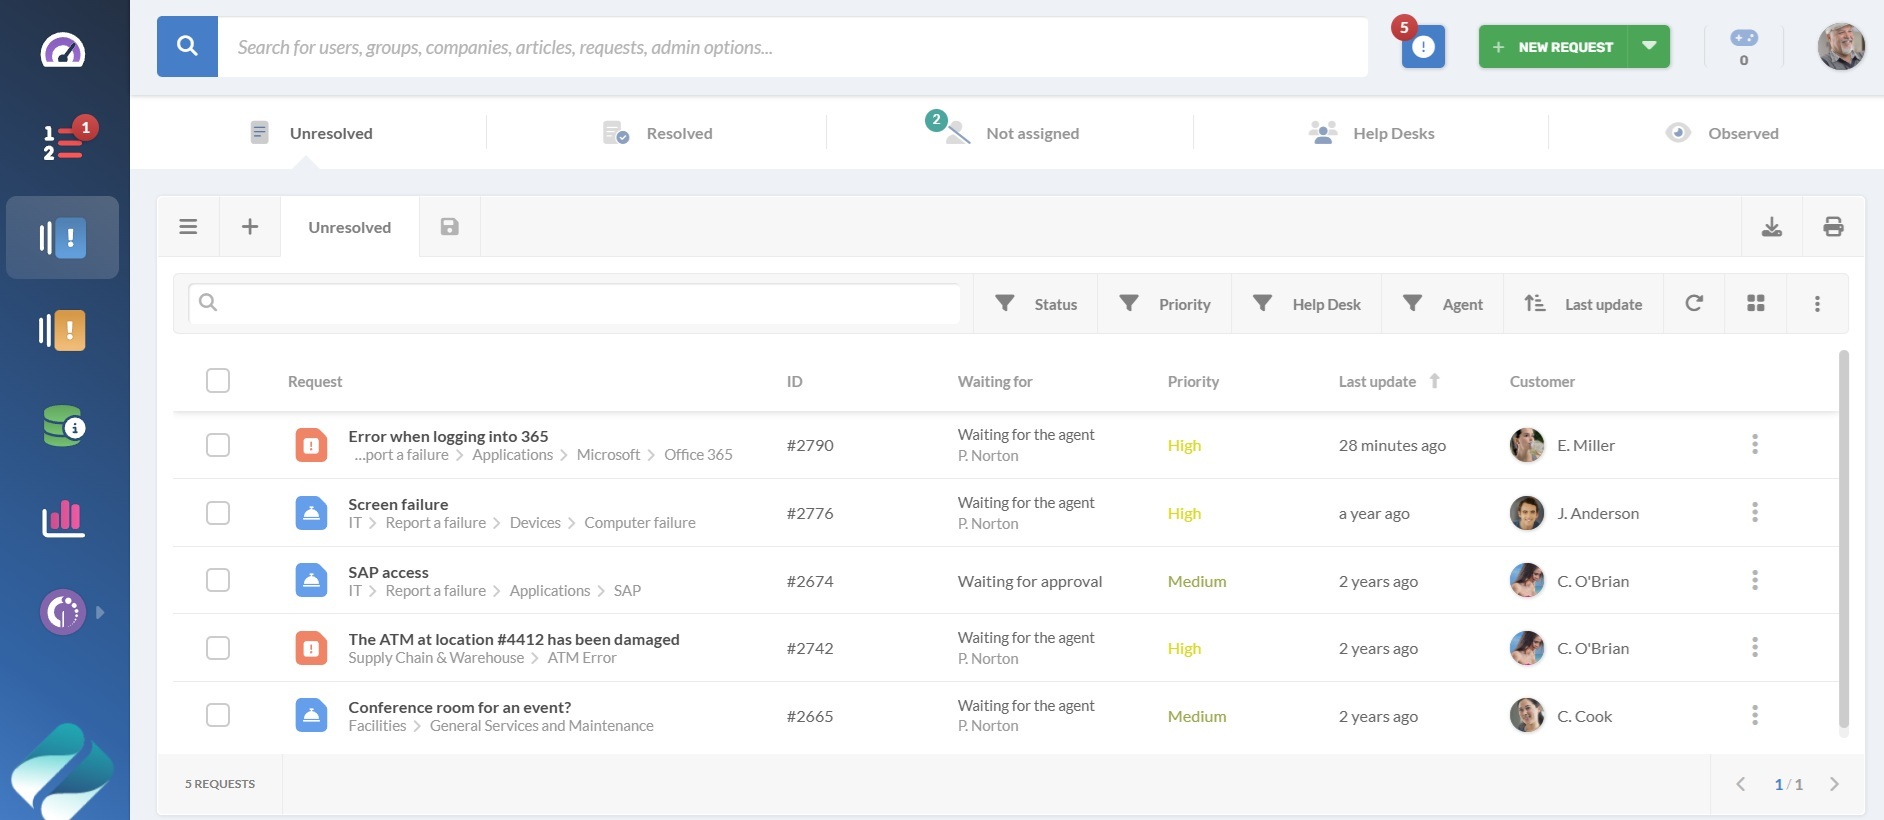
The Requests tab shows all tickets in a central location. You can access default views like:
- Unresolved: Tickets waiting on action.
- Resolved: Completed tickets, waiting for user confirmation.
- Not assigned: Tickets without an owner.
For all the views, you can narrow the list by applying quick filters (status, priority, help desk, assigned agent) or open advanced filters to combine conditions. You can also switch between list and card view, set results per page, pick the sort order, and more.
Agents can also create custom views to focus on specific requests:
- Click the + icon to start a new view.
- Apply the filters you want to focus on, such as status, priority, category, or SLA.
- Click Save, add a name and an optional description, then confirm.
- Once saved, you can pin the view for quick access or share it with agents or help desks you belong to.
For example, set filters for status = open and priority = high, then save the view as Urgent requests and pin it to always have your top priorities at hand.