Build a complete employee onboarding workflow without custom integrations with InvGate
Employee onboarding often creates operational overhead. Each new hire triggers requests across HR, IT, and other teams, all tracked in different ways. Without automation, coordinating tasks, approvals, and handoffs quickly becomes hard to manage.
No-code workflows remove that complexity. Instead of custom integrations or manual follow-ups, you define the onboarding process once and reuse it. With InvGate Service Management, requests move automatically between teams and progress stays visible from start to finish.
What do you need to implement this automation?
To automate employee onboarding, you first need a well-defined process, independent of any tool. These are the basics the process should cover:
- A single entry point for onboarding: One request that captures all the required information from the start.
- Clear steps and ownership: Each task in the process has a defined owner across HR, IT, and other teams.
- Conditional paths: Different flows depending on role, location, or employment type.
- Approvals where needed: Access, equipment, or licenses move forward only after the right sign-off.
- Visibility into progress: A clear view of what’s completed, pending, or blocked.
InvGate Service Management allows you to implement this structure without custom integrations or technical overhead:
- Customizable onboarding requests to collect and reuse data.
- No-code workflows to define steps, rules, and handoffs.
- Automatic task assignment and approvals to reduce manual coordination.
- Built-in action connectors to trigger specific actions in external tools.
- Status tracking and notifications to keep progress visible end-to-end.
How to automate an employee onboarding workflow in InvGate?
#1. Set up the employee onboarding workflow

There’s a simple way to set up an employee workflow: just select the onboarding workflow template and customize it to your needs.
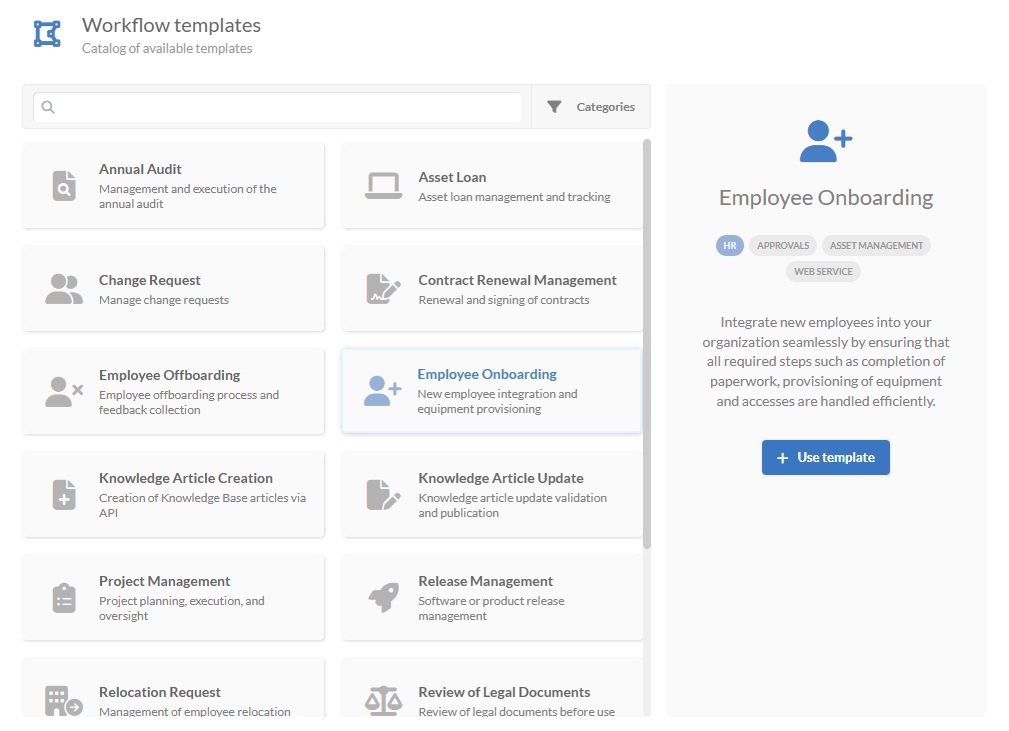
- Log in with an admin role and go to Settings > Requests > Workflows.
- Select the Employee Onboarding workflow from the list of templates.
- Click Use template to see the workflow in the Diagram Editor.
Tip: From Settings > Requests > Workflows, you can also create new ones from scratch (by clicking on “Add”), import workflows with the .sdw extension, or view and edit existing ones.
If the template is enough for your needs, you can use it as it is. If you need to tweak it, keep reading.
#2. Edit the onboarding workflow template

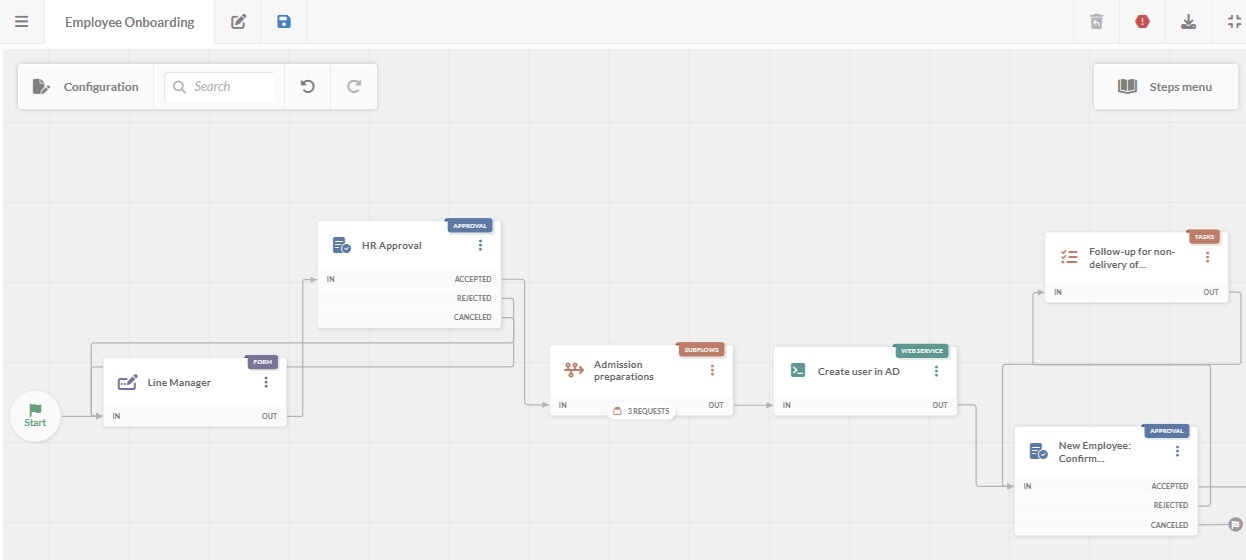
In the workflow diagram, you access the options that help define how the workflow behaves, who manages it, and what users see. You can double-click on any block to open its configuration and modify forms, tasks, approvals, and more.
Here’s what each block does:
- Start form – The onboarding workflow begins with a form designed to gather essential details about the new hire and the approval chain. This includes information like their name, department, role, start date, and any documents you need.
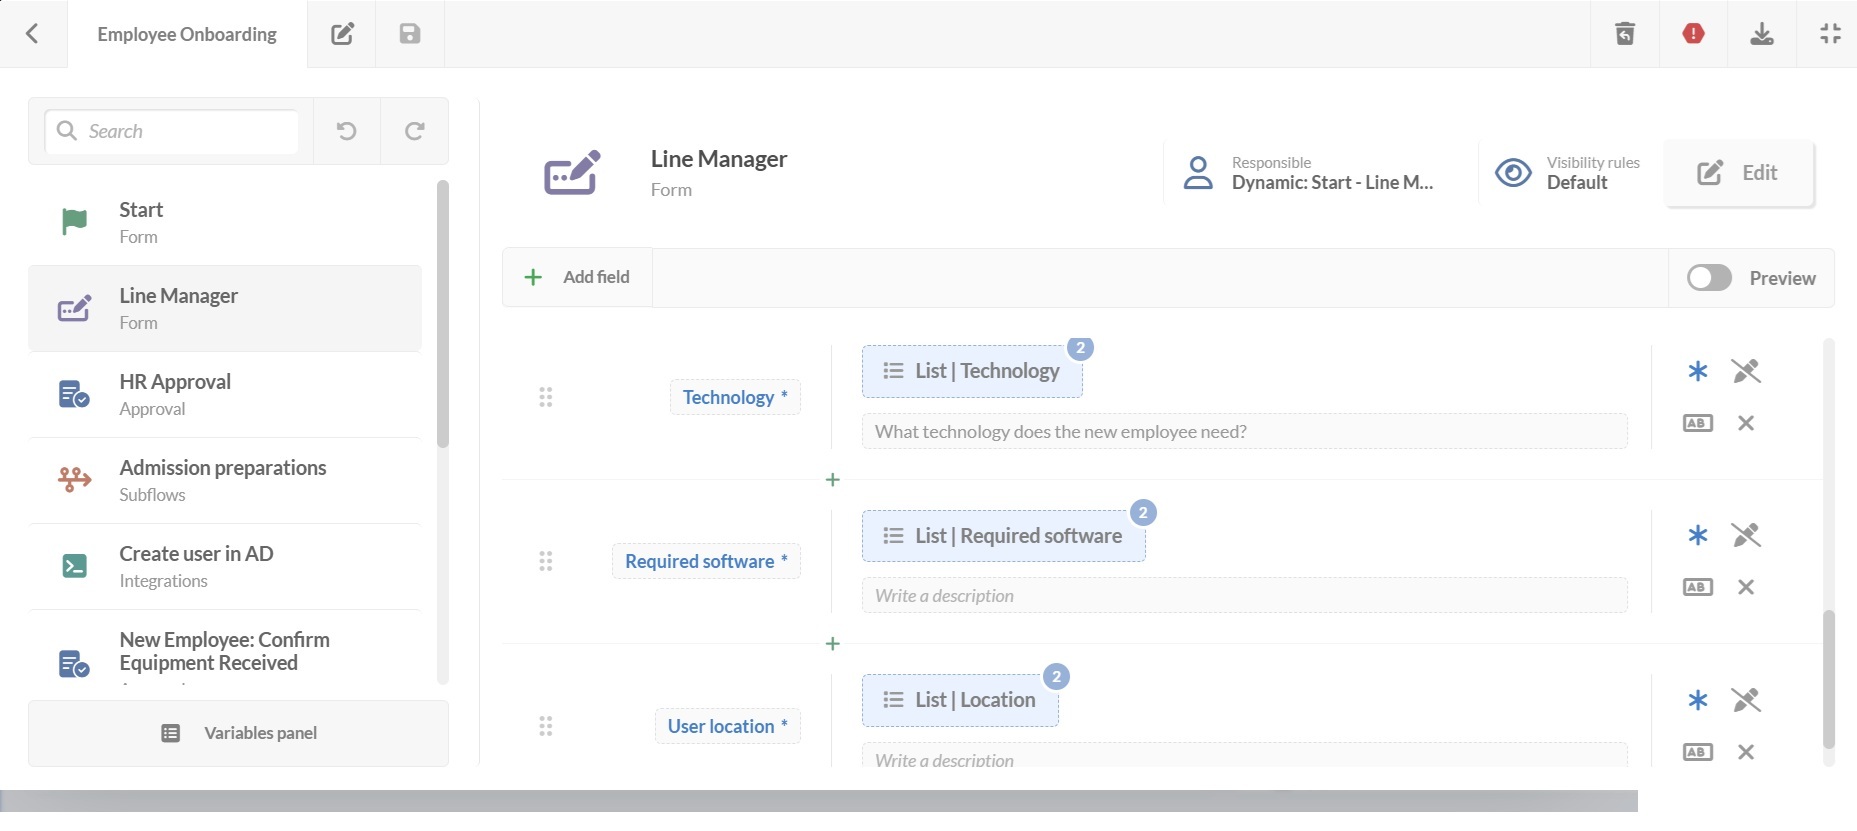
- Line manager form – Next, the manager fills in more specifics: where the employee will work, which devices they’ll use, and what software or systems they need. Each field can be marked as required or optional, so the workflow doesn’t move forward unless critical data is filled in.
- HR approval – HR reviews the information to make sure everything is correct before the work begins. If changes are needed, it goes back to the manager; if approved, the process moves on.
- Preparations – Separate tasks are automatically sent to the right teams. HR handles contracts and benefits, IT sets up accounts and devices, and Facilities (or the relevant team) prepares the workspace or arranges shipping.
- Account creation – The system can create the employee’s profile in tools like Azure AD, Google Workspace, or Okta, so their access is ready by day one.
- Confirm equipment – Once everything is ready, the new hire or their manager confirms that devices and software were received and are working. If there’s a problem, it loops back to IT for follow-up.
- Asset tracking – For those using InvGate Asset Management, these blocks connect the onboarding tasks directly to asset tracking. This allows your IT team to stay aligned on hardware allocation and maintain up-to-date records. These are the two steps already included in our template:
- Generate team document for asset assignment: A task to create and share a document with the employee's assigned equipment (e.g., laptop, phone, peripherals).
- Update assigned assets in the inventory: Link the assigned equipment to the new employee in InvGate Asset Management so the records reflect who has what from day one.
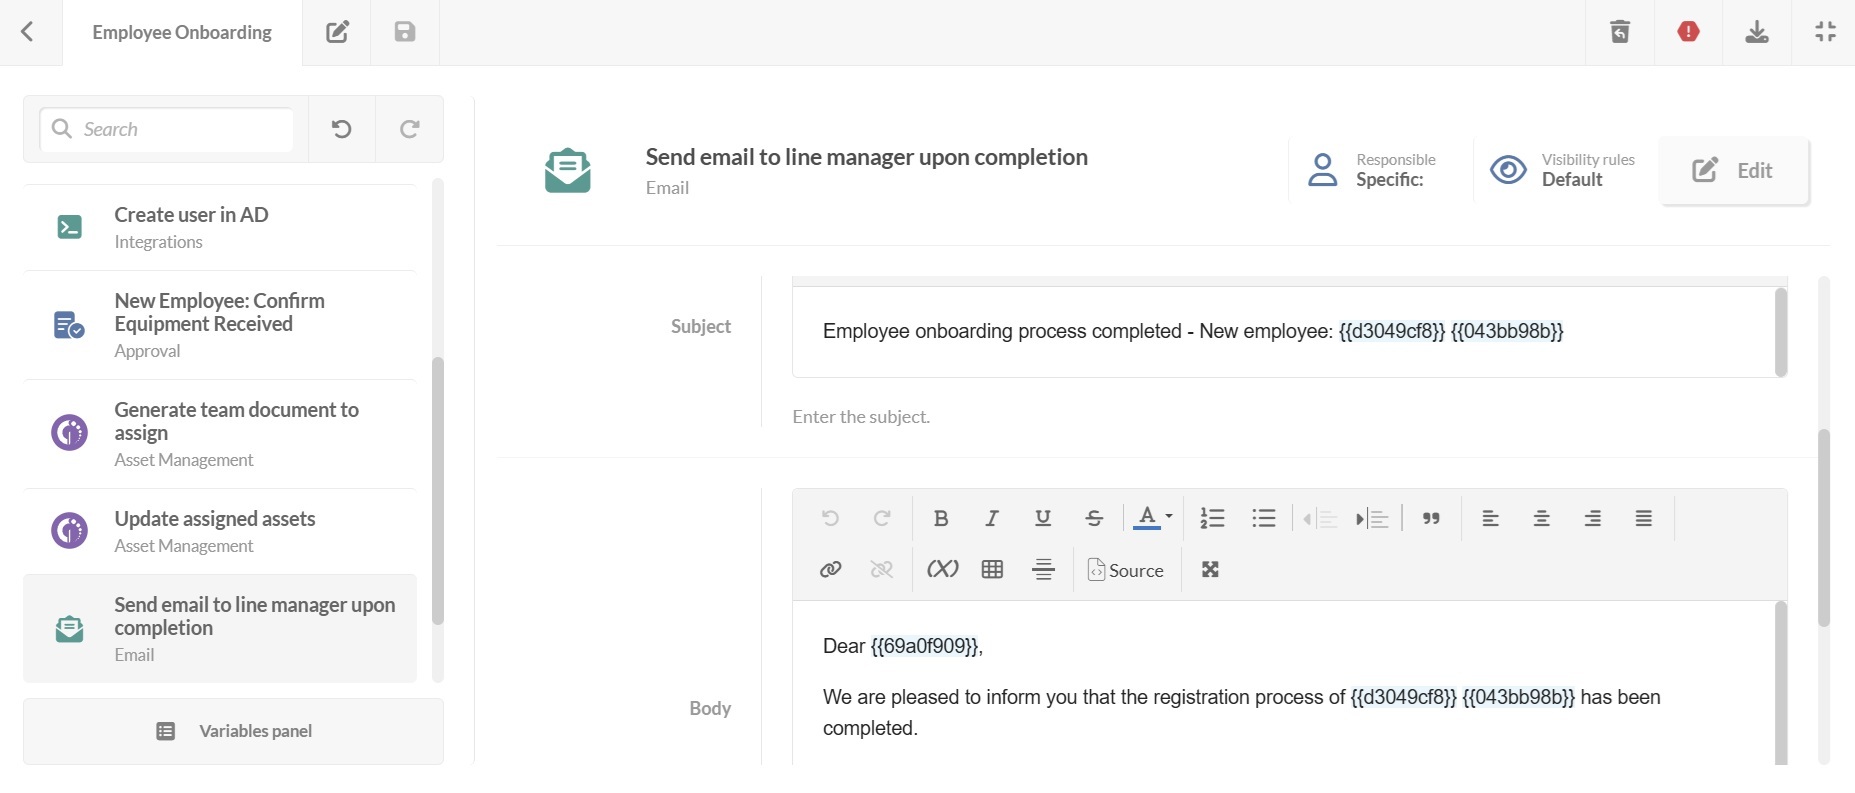
- Manager notification – The manager gets a summary email confirming the onboarding is complete, including what was provided and any open tasks.
- End – The process closes once all steps are complete, with a full record of the onboarding stored for reference.
Tip: Adjust the fields to match your company's legal or internal requirements.
Tip: Using predefined lists for items like laptop models or office locations speeds things up and keeps information consistent.

Tip: You can restrict visibility in any step, so for example, you can allow only the HR group to see this stage.

#3 Add actions with built-in connectors
Once the workflow’s core structure is in place, you can connect onboarding steps with the tools your teams already use. Instead of building custom integrations, built-in action connectors can be added directly to specific workflow blocks.
Because these actions are one-way and triggered by the workflow, they run only when needed and do exactly what the step requires. You control when they execute and what data they use, without maintaining ongoing integrations between systems.
Here are a few examples of how they fit into an onboarding workflow:
- After HR approval: Schedule onboarding-related events in Google or Outlook calendars, such as a welcome meeting, IT setup session, or required training.
- During account creation: Create user accounts in tools like Okta using data already collected in the onboarding forms, avoiding manual re-entry.
- When assigning software access: Grant access to applications or groups based on role or department, following predefined rules instead of manual decisions.
Because these actions are one-way and triggered by the workflow, they run only when needed and do exactly what the step requires. You control when they execute and what data they use, without maintaining ongoing integrations between systems.
#4. Deploy the workflow
Once your onboarding workflow is ready:
- Click on the save icon and return to the Workflows menu.
- Click on Publish version to activate the updated workflow.
- Assign it to a request category, in this case, Human Resources.
- Click Assign now to apply it.
Anyone using that request from now on will follow this updated workflow.
Download your free employee onboarding process template
Get started faster with a ready-made employee onboarding workflow you can adapt to your organization. The template includes the core steps, approvals, and task structure necessary to run onboarding consistently from day one. Download the onboarding workflow template.
Try InvGate Service Management with a 30-day free trial and see how the full workflow runs in practice. Use it as a starting point, adjust the forms and workflow logic, and automate the process with our building blocks – no custom integrations needed!