How to use the CMDB for change processes
Using a CMDB for change process is one of the most effective ways to reduce risks, improve visibility, and keep IT operations running smoothly. It helps you understand what will be impacted by a change, who’s responsible, and how everything is connected.
In this how-to guide, we’ll walk you through how to use InvGate Asset Management to support your Change Management process by:
- Creating Business Applications to visualize relationships and track change impact.
- Inspecting the CIs involved to make informed decisions.
- Linking assets to your change workflow (via integration with InvGate Service Management).
- Building a dashboard to monitor Business Application activity.
#1. Create Business Applications to visualize relationships and track change impact
Business Applications (BAs) in InvGate Asset Management let you group related configuration items (CIs) into a single, visual structure. This helps you map dependencies, understand the potential impact of changes, and make informed decisions faster. Each Business Application acts as a CI itself, which means you can even nest them if needed.Imagine your organization runs a small internal Business Analytics service hosted on Google Cloud Platform (GCP). It includes a virtual machine, a database, cloud storage, and a few responsible users. You want to group everything into a single Business Application so you can track how changes affect the service.
Here’s how to build that Business Application, in steps.
Step 1: Create a Business Application
- Click the green “+” button in the top-right corner to create a CI.
- Click Business Application and fill the required fields:
- Name: “Business Analytics – GCP”.
- Owner: search for a user who will act as the responsible for the BA.
- Location: choose from one of the locations created in the tool.
- Tags: if needed, select all the relevant tags for the BA.
- Click Save to complete the process.
Step 2: Add configuration items

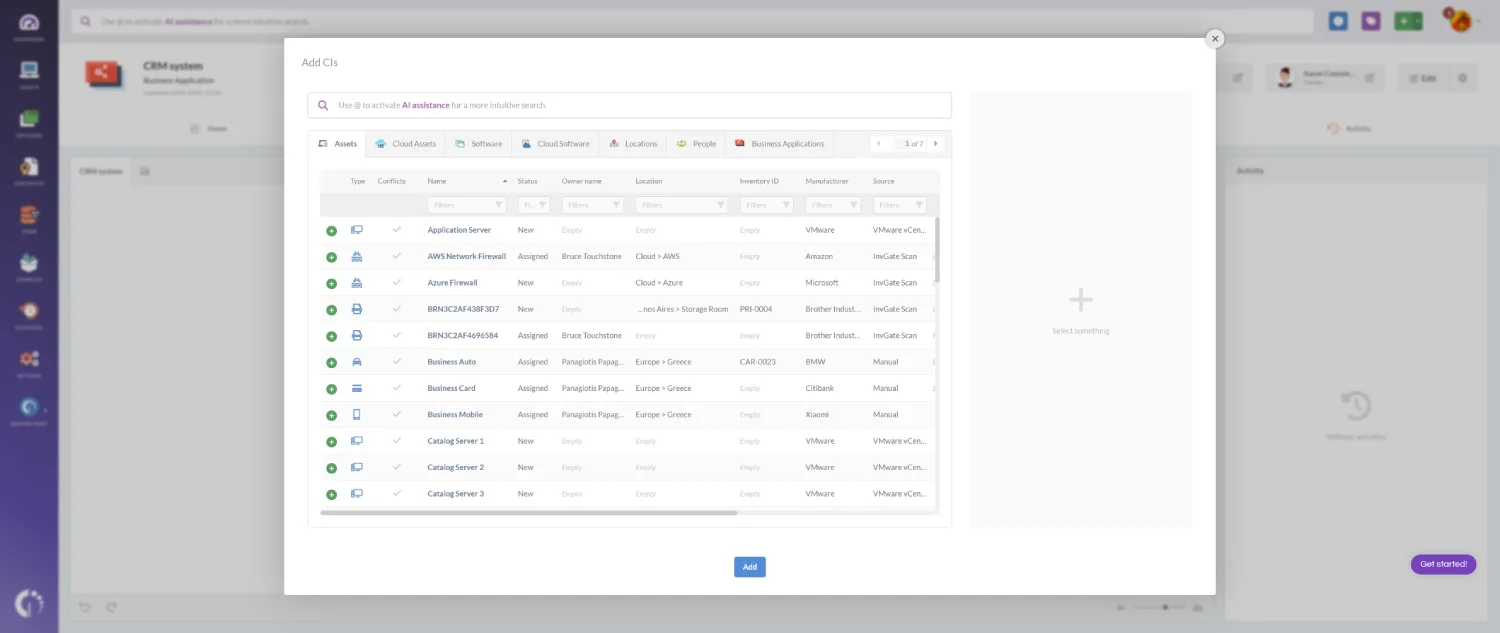
- Locate the diagram section, and click the “+” button in the right-bottom corner of the section to add CIs.
- Search for the relevant CIs. For example, a GCP Compute Engine VM, a Cloud SQL database, and Cloud Storage.
- Click Add.
Note: A Business Application can include as many CIs as needed. It can be simple and lightweight, like this one, or as large and complex as your infrastructure requires.
Step 3: Link the configuration items

- Once the CIs are added, define how they relate to each other. Click any CI and define:
- Relationship type (e.g., “Connected To,” “Consumes,” “Contains,” etc.).
- The related asset.
- Criticality level (Low, Medium, or High).
- Click the Save icon to confirm your changes.
This structure shows how assets are interconnected, giving you immediate visibility into which CIs are most critical and where a change might have the most impact.
#2: Inspecting the CIs involved to make informed decisions
Once your Business Application is created and populated with CIs, the next step is to understand each component’s role, condition, and relevance before approving or planning a change. InvGate Asset Management lets you do exactly that — without leaving the CMDB.
To inspect a CI:
- Go to CMDB.
- Click your chosen Business Application.
- From the diagram or the list, click on the specific asset you want to analyze. You’ll be taken to a detailed CI profile view, where you can review all its information.
#3. Link assets to your change workflow
Once your Business Application is built and reviewed, the next step is to integrate it into your Change Management process using InvGate Service Management.
Note: To link Business Applications or CIs, make sure that InvGate Asset Management is integrated with InvGate Service Management.
By default, the Change Request workflow in InvGate already supports linking CIs (including Business Applications) directly to each request. This connection brings full context into the process, helping teams assess impact, trigger conditional steps, and maintain traceability.
Here’s how it works:
- Click New Request in the top-right corner of the screen.
- Select Change Request, then click Create Request.
- Scroll down on the right-hand section until you see “Configuration items and devices”.
- Use the search bar to find any CIs involved in the request. In this case, we’re selecting our brand-new “Business Analytics – GCP” Business Application.
- Complete the remaining request information and click Start Request.
#4. Build a dashboard to monitor Business Application activity

Once your Business Applications are in use (and tied to requests and changes) the next step is to track their behavior over time. InvGate Asset Management allows you to build custom dashboards that give you visibility into asset health, usage, and related activity for each BA.
Here’s how to build a dashboard to keep an eye on your Business Applications:
- Go to Dashboards.
- Click the “+” icon to create a new dashboard.
- Don’t apply any general filters for now.
- Fill in the following fields:
- Name: Business Applications overview.
- Description: A visual summary of Business Applications, their associated assets, and criticality.
- Click Chart and select the following information:
- Visualization: Pie - Without order.
- Metric: Assets - Total.
- Dimension: Business Application.
- Drilldown: Type (optional).
- Filters: None required for this example.
- Name: Assets by Business Application.
- Click Save to create the chart and add it to your dashboard.
Note: Adding charts is simple – they all follow the same logic. So, we’ll use the creation of the “Assets by Business Application” chart as an example.
Other chart examples from this dashboard:
- Total Business Applications – Single number showing how many are active.
- Business Applications by location – Bar chart displaying how BAs are distributed by location.
- Cost of Business Applications – Shows total cost grouped by BA.
- Business Applications by open requests – Pie chart showing request volume per BA.
- Critical assets by Business Applications – Highlights The BAs by health status.