How to create a change request workflow in InvGate
Handling change requests without automation forces teams to rely on manual approvals, disconnected tools, and incomplete tracking, increasing the risk of unreviewed or poorly coordinated changes.
What do you need to implement this automation?
Automating change requests starts with clarity at the process level. Before configuring anything in InvGate Service Management, the steps of your change process must already be defined.
That includes what information a change request must capture, which approvals are required, how risk or impact is assessed, and when tasks are assigned or executed. Automation enforces those rules, but it does not define them for you.
On the tooling side, InvGate Service Management provides the features needed to translate that process into an automated workflow without custom integrations or development.
Using built-in no-code configuration, you can create structured request forms, define approval flows based on conditions, and automate task creation and notifications within the same platform. All of this happens natively, and change requests will move through the workflow, giving you full traceability and control, without relying on external systems or custom connectors.
How to build a change request workflow in InvGate Service Management
#1. Set up the request for change workflow

There’s a simple way to set up a Change request workflow using InvGate Service Management:: just select the change request workflow template and customize it to your needs.
- Log in with an admin role, then go to: Settings > Requests > Workflows.
- Select the Request for Change workflow from the list of templates.
- Click Use template, and you’ll see the workflow in the Diagram Editor. Here, you can view and configure the workflow and the sequence of steps.
Tip: From Settings > Requests > Workflows, you can also create new ones from scratch (by clicking on “Add”), import workflows with the .sdw extension, or view and edit existing ones.
If the template is enough for your needs, you can use it as it is. If you need to tweak it, keep reading.
#2. Edit the change request workflow template

In the workflow diagram, you access the options that help define how the Change Management workflow behaves, who manages it, and what users see. You can double-click on any block to open its configuration and modify forms, tasks, approvals, and more.
Here’s what each block does.- Start form
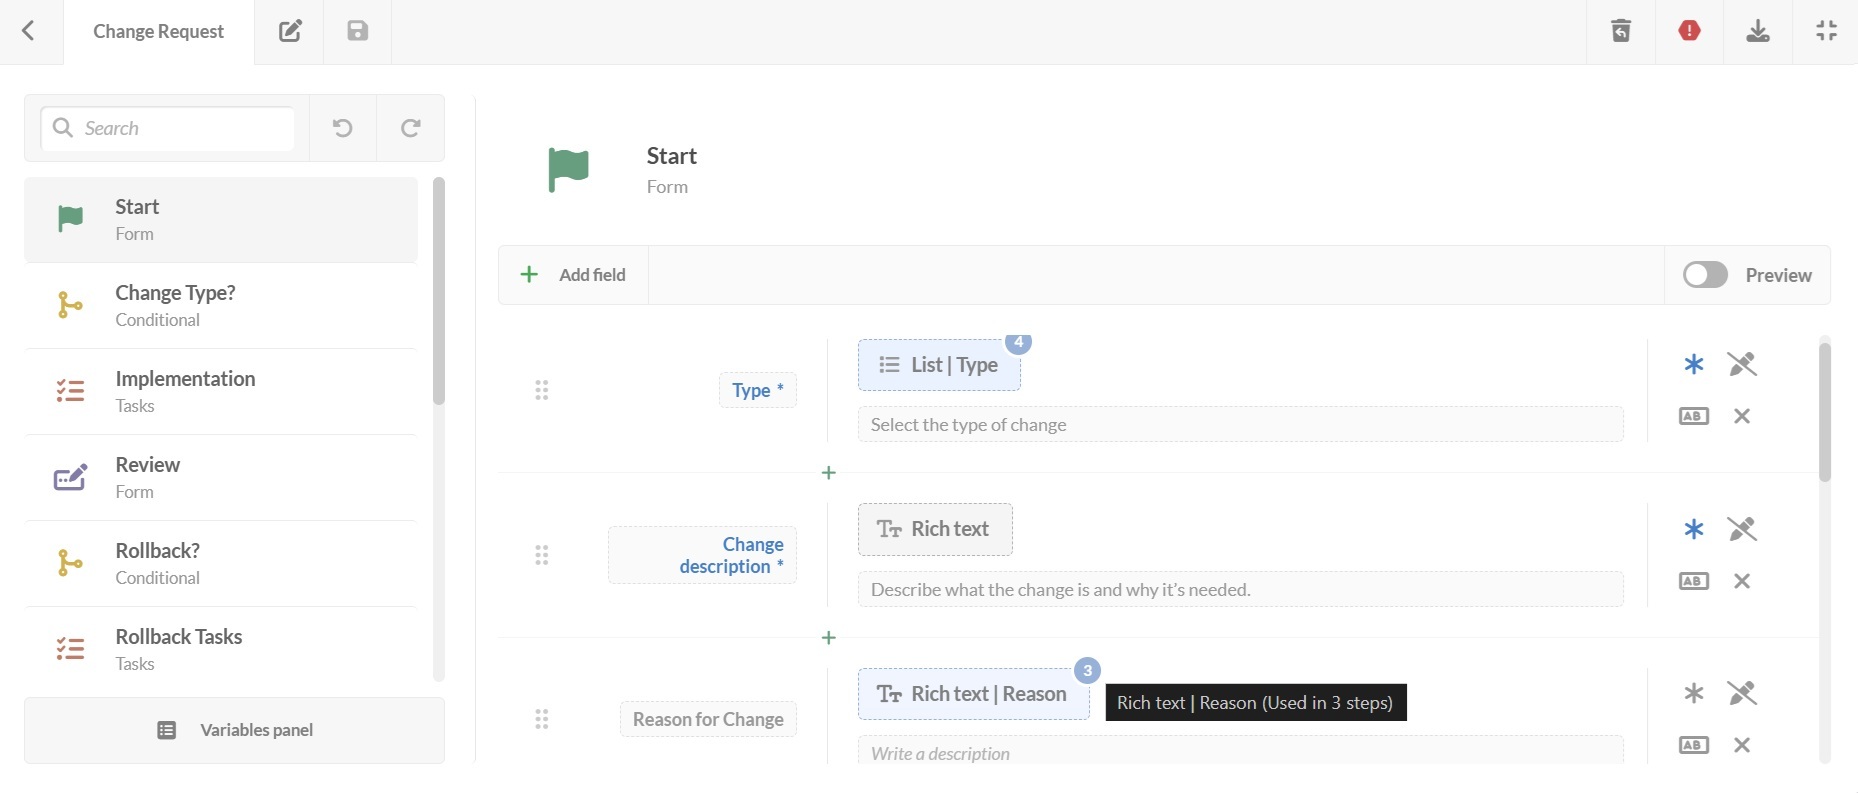
The process begins with a start form where the requester provides all the initial information needed to assess the change. You can add, remove, or modify fields and decide whether they’re mandatory.
Default fields:
- Type of change – Emergency, Standard, Normal.
- Change description.
- Reason for change.
- Configuration item(s) involved.
- Date and time of change.
- Activity plan – Step-by-step outline of how the change will be executed.
- Rollback plan – Actions to reverse the change if necessary.
- Documents – Attach supporting files or technical documentation.
Tip: Include only fields that add value to decision-making. Too many required fields can slow the process, especially for urgent requests.
- Categorize the change type
This is a conditional step, so the change follows the right review and approval path.
- ECAB (Emergency Change Advisory Board) – For urgent changes that must be implemented quickly to prevent major incidents or address immediate business needs.
- CAB (Change Advisory Board) – For standard changes that require detailed review and planning.
- ELSE – Low-risk changes that can be approved with minimal oversight.
- Risk and impact assessment
Reviewers assess the change using two key factors:
- Risk: High / Medium / Low.
- Impact: High / Medium / Low
These values can be used to place the change on a risk-impact matrix, helping prioritize review effort and determine approval requirements.
- Approval (CAB/ECAB)
The change request is routed to the appropriate approval group:
- CAB for standard changes.
- ECAB for emergency changes.
For both cases, the possible outcomes are:
- Accepted – The change moves to the implementation stage. At this point, you can trigger notifications to keep affected teams informed. For example, InvGate Service Management lets you create an internal announcement that appears as a top-bar message when affected users log in, remaining visible for the duration of the change. The message may indicate a scheduled maintenance window or warn that specific services could be temporarily affected.
- Rejected or canceled – The request is stopped, either because it does not meet requirements or priorities have shifted. In this case, an automated email notification is sent to the requester and stakeholders with the decision.
- Implementation
Approved changes move into execution. This stage has a task list to follow. For each task, you can define: Name, description, due date, and responsible person.
Other settings:
- Allow new tasks during execution – Gives flexibility if unplanned steps arise.
- Optional tasks – Lets the process proceed without completing all tasks.
- Review
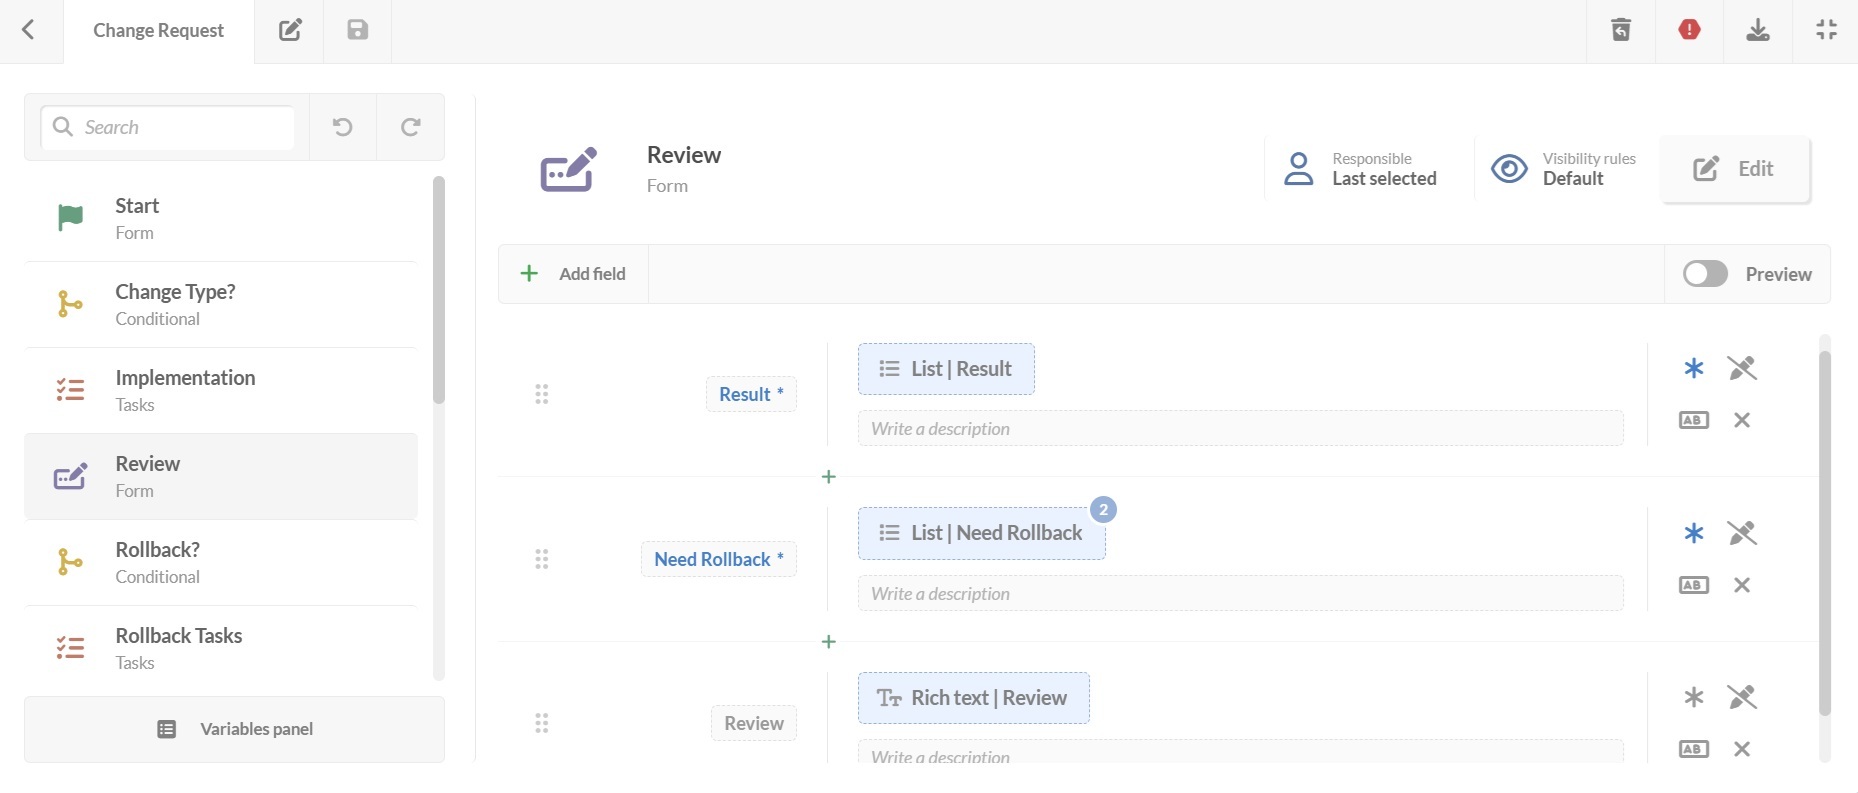
Once implemented, the change is reviewed to verify the results:
- Tasks were met.
- Change was completed by the planned date.
- No unintended side effects occurred.
- Rollback is needed, yes/no.
It also includes an open text field for outcomes, where reviewers can document detailed observations. This written record is valuable for audit processes or future reference, so change owners can anticipate risks or replicate successful approaches.
- Rollback decision
A conditional step where, based on the review, it will be determined if a rollback is needed:
- Rollback – If the change caused issues or failed to meet objectives.
- No rollback – If the change is successful.
Tip: Always validate the rollback plan during the approval stage to avoid last-minute surprises.
- Final step
Depending on the rollback decision, the workflow continues with:
- Rollback activities: A list of tasks to restore the environment to its prior state.
- Notify change complete: An automated email notification to all stakeholders confirming completion.


# 3. Deploy your workflow
Once your change request workflow is ready:
- Click on the save icon and return to the Workflows menu.
- Click on Publish version to activate the updated workflow.
- Then, assign it to a request category from the service catalog, in this case, “Change requests” under the corresponding department, IT.
- Click Assign now to apply it.
Anyone using a change request from now on will follow this updated workflow.
Additional customization for your change request workflow
As we mentioned, in InvGate Service Management, every node in your workflow can be adapted to fit your organization’s policies and approval structure.
When tailoring a change request workflow, you’re not limited to the sequence shown in a template. You can:
- Reorder stages – For example, move risk assessment before categorization if your organization prefers to evaluate scope first.
- Expand forms – Include additional mandatory fields, such as cost estimates, vendor involvement, or links to related incident/problem tickets.
- Add extra approval layers – For example, insert an additional review block for changes involving high-impact CIs.
- Insert conditional steps – Create branches that skip unnecessary stages. For instance, bypass a full CAB review for pre-approved standard changes.
- Email – Add automatic email alerts at points where stakeholders need to act or be informed (e.g., testing completed, rollback initiated).
- Include integration points – Use Web Service blocks to update your CMDB, notify monitoring tools, or trigger scripts in deployment pipelines.
Download your free change request process flow template
Download the change request workflow template to map a structured change request workflow! It covers the key steps required to submit, review, approve, and implement changes with clear ownership and visibility.
Want to put it all into practice? Start a 30-day free trial of InvGate Service Management and build your change request workflow using no-code automation.