How to set up your service desk for visibility while keeping it secure
Keeping your service desk both collaborative and secure is key to running efficient support operations With InvGate Service Management, you can configure visibility rules, assign watchers, and define role-based permissions so the right people have access to the right information. These settings help your team stay informed and work together while protecting sensitive data.

#1. Apply role-based permissions

Before jumping into the configuration, it’s useful to understand how user types and roles work in the system. Each determines what someone can see and do within the platform.
- User types define whether someone is an agent (working on requests) or an end-user (submitting and following their own requests; they don’t have a license).
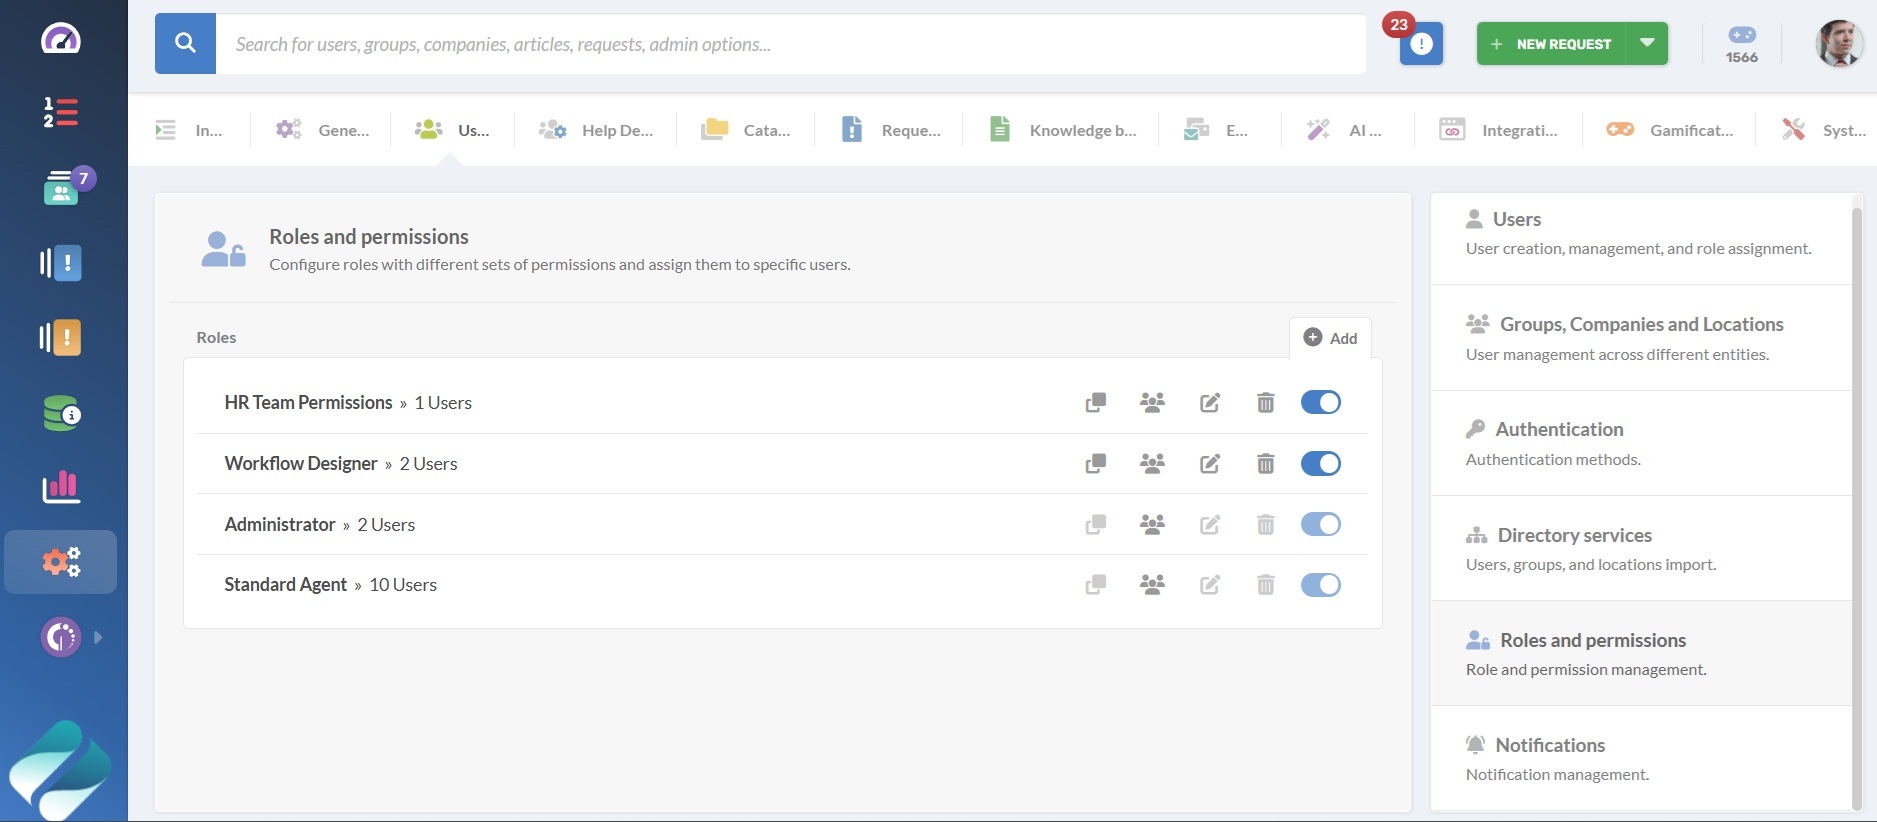
- Roles define the permissions within each user type. Predefined roles include Administrator (full access), Standard Agent (restricted access), and Manager (access to their help desk and reports). You can also create custom roles for more granular control.
Permissions control who can see and act on tickets, queues, and configurations. Defining them by role creates consistency across your organization.
- Go to Settings > Users > Roles and permissions.
- Create or edit a role (Administrator, Help Desk Manager, Agent, or a custom role).
- Define permissions for actions such as Approvals, editing SLAs, etc.
- Under “Members,” add the appropriate users to the role.
#2. Structure your help desks

Once roles are defined, the next step is to create help desks and decide how people will interact within them. In InvGate Service Management, help desks are the core unit of work, grouping the agents, managers, and requests for a specific function or department.
What a help desk setup includes:
- Desks, sub-desks, and levels: For example, you could have an IT help desk with sub-desks for Hardware, Software, and Security.
- User assignment: A person can belong to multiple desks or levels, but their role will always determine what they can do.
How to configure it:
- Go to Settings > Help Desks.
- Create a new help desk (and sub-desks if needed).
- Add at least one Manager: Assigned to desks or sub-desks. Managers oversee performance, assign work, and manage requests regardless of which agent is handling them.
- Add at least one Agent per level: Agents are assigned to levels and are responsible for resolving requests.
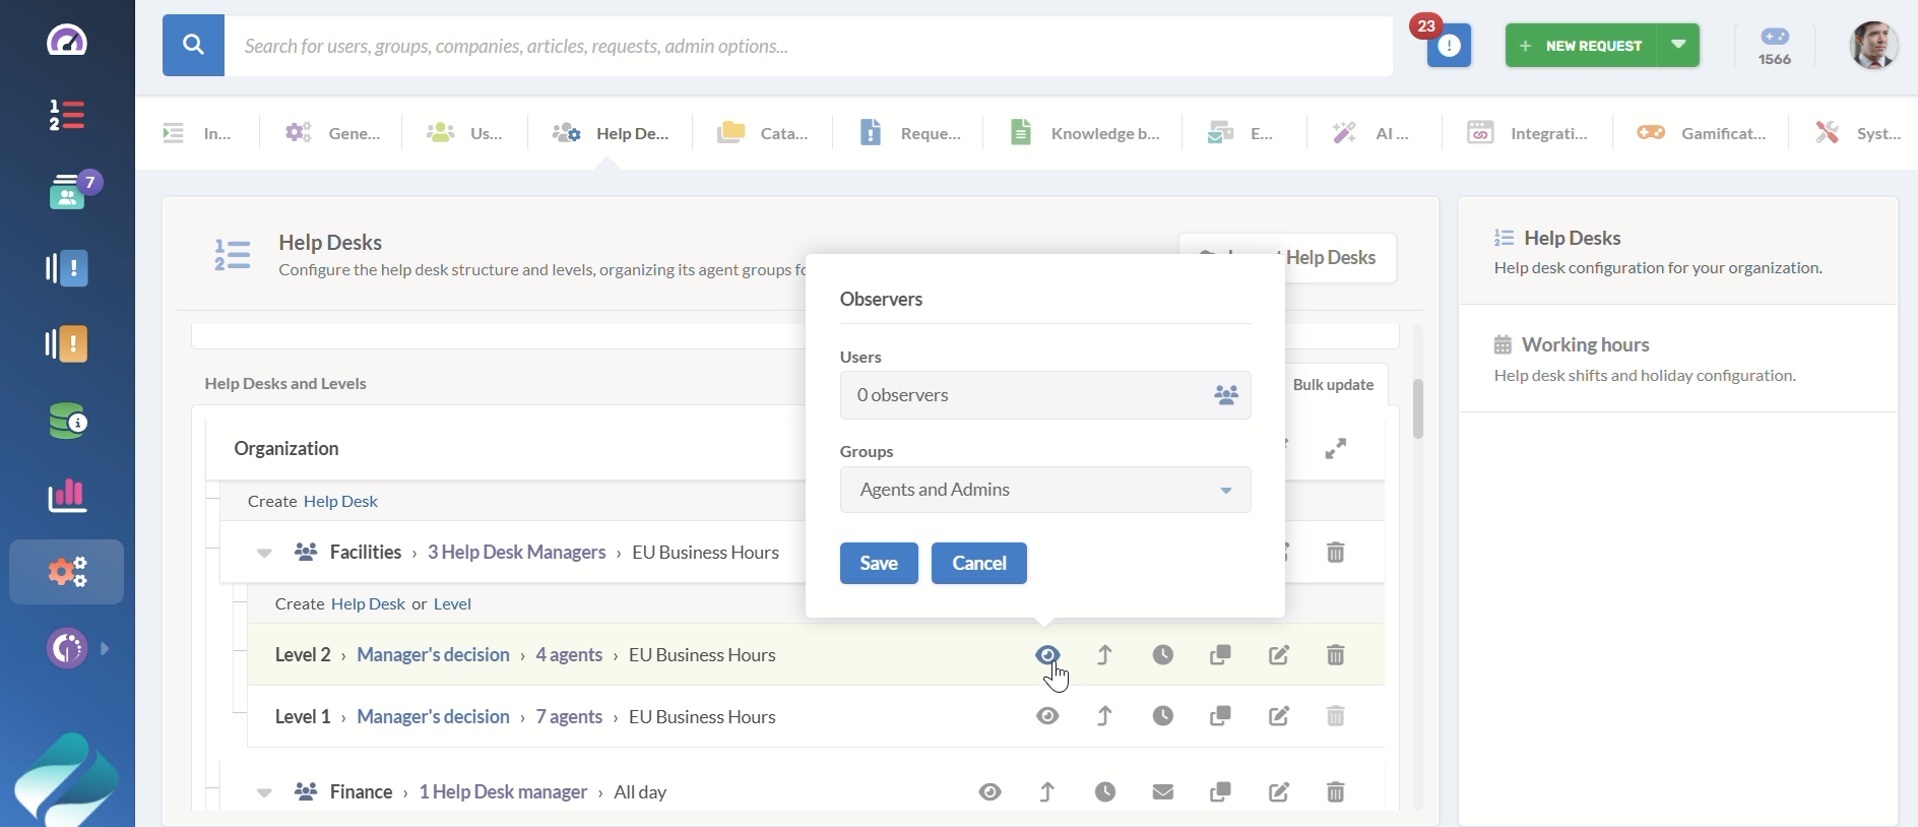
- Add Observers (optional): After desks and levels are created, you can click the eye icon to assign observers. Observers can view requests in those areas but don’t have the privileges of managers or agents.
#3. Configure restricted visibility
Restricted visibility settings let you control exactly which agents or managers can access ticket content. These options protect sensitive information while still allowing necessary collaboration.
1. Restricted mode
This is a system-wide setting found at Settings > Requests > General > Permissions. You can turn on Restricted Mode there and save changes.
You’ll find some other important toggles to configure system-wide permissions under the same menu. Including:
- Only participants of a request (assigned agents, collaborators, observers) can see the full ticket.
- Observers of related groups (help desks, levels, companies, or locations) can see the ticket listing and access it.
- All other users won’t see the request in lists or searches.
You’ll find some other important toggles to configure system-wide permissions under the same menu. Including:
- End-user collaboration: Lets end-users comment on requests they have access to, even if they didn’t create the request.
- End-users can add observers and mention others: Enables end-users to add observers and use mentions within requests.
- Internal comments visibility: Let agents/managers view internal comments on requests.
- Hide actions from agents: Choose which actions to hide, like reassign, escalate, merge, duplicate, reject, reopen, or cancel.
2. Restricted help desks
This setting applies to individual help desks, particularly if they handle sensitive or confidential information. When enabled:
- Only the help desk members and the request’s customer can view full ticket details.
- Observers can see the ticket in listings but cannot access content (they see a “restricted access” message).
- Internal comments are only visible to help desk members.
To configure it:
- Go to Settings > Help Desks.
- Select the pencil icon to edit the help desk you want to restrict.
- Click on the Restricted Access check box, and save changes.
#4. Observers and collaborators on tickets
Earlier, we saw how to add observers at the help desk level to monitor all requests in a desk or sub-desk. The same concept also applies to individual tickets, giving you the flexibility to grant visibility request by request.
Observers are users who can follow the progress of a specific request but can’t make changes unless their role already grants them permissions.
If an observer needs to engage, they’ll automatically become a collaborator as soon as they add a comment or resolve a task. Collaborators can actively contribute to the request while still respecting the role-based permissions you’ve defined.
How to configure observers and collaborators
- Log in as an administrator and go to Settings > Requests > General Options > Permissions.
- Enable the Add observers option. This allows both agents and end-users to add observers directly to requests.
Observers can be added in different ways:
- Manually: Open a request and add the user in the participants section.
- Automation: Configure rules to add observers automatically based on conditions.
- Mentioning: Use @mentions in request comments to pull someone in.
- Email CC: Anyone copied in on an incoming email becomes an observer.
- Processes: Approvers are added automatically when their stage comes up.
#5. Control service catalog visibility with rules
Not every request type in your catalog should be visible to everyone. Some categories are internal (like HR requests that only HR staff should raise), while others are highly technical (such as server configurations) that end-users won’t understand or need access to. Visibility rules let you control who sees what in the catalog, keeping it relevant and secure.
They use conditions like roles, groups, companies, or locations to define which parts of the catalog a user can see. When a user opens the catalog, only the request categories that match their rule will appear.
How to configure visibility rules:
- Log in as an administrator and go to Settings > Catalog > Visibility Rules.
- Click Add to create a new rule.
- Configure the rule:
- Give it a name.
- Select the roles, groups, companies, or locations it applies to.
- Choose whether it affects the entire catalog or only specific categories.
- Define the visible priorities if needed. For example, not allowing end-users to set requests as Critical.
- Adjust extra settings like hiding the occurrence date or controlling how locations appear.
- Save the rule.
Visibility rules prevent confusion and clutter for end-users while keeping sensitive or technical request types limited to the right audience. The result is a catalog that’s tailored, secure, and easier to use.
#6. Shared dashboards
Dashboards let you build charts and graphs to track request data by different measures and dimensions. Managers and Administrators can share dashboards with other users.
- Go to the Dashboards tab.
- Click the menu button with three horizontal lines to see cards with all your dashboards.
- Click the share icon on the dashboard you want to share.
- Select the users you want to give access to.
Shared dashboards still respect each user’s visibility permissions. For example, an IT manager may see all tickets in the system, while a department lead only sees those raised by their team.
For end-users, visibility depends on the help desks and levels they follow. If an Administrator doesn’t add them as observers for those areas, they will only see charts for their own requests.